
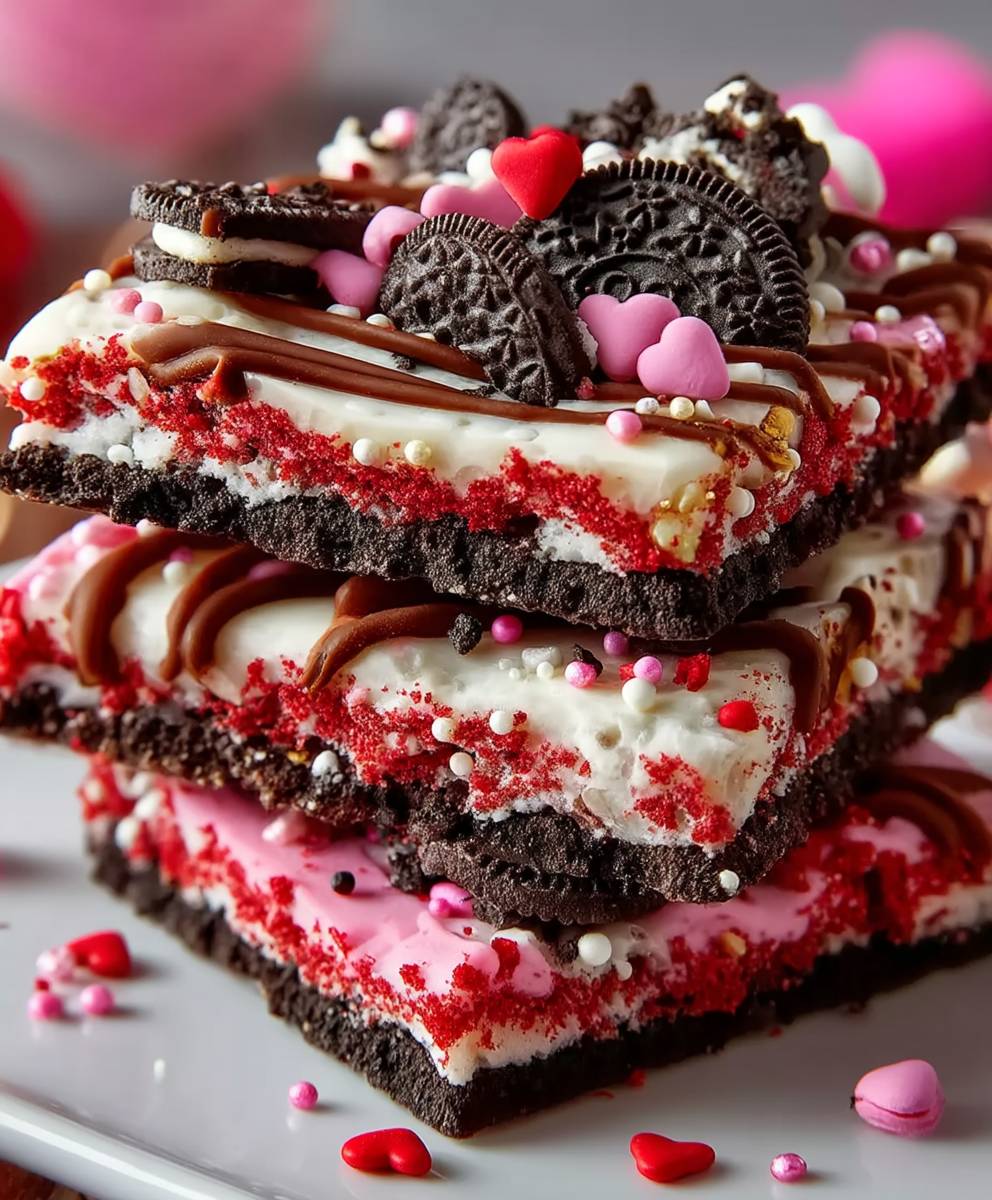
Forget elaborate three-course dinners that inevitably involve burnt sauces and awkward cleanup. This year, we embrace pure, unadulterated sweetness—a rich, crunchy treat that requires zero oven time and guarantees smiles. Dive into the dazzling pink and white swirls of the perfect, stress-free gift: this spectacularValentine’s Day Oreo Cookie Bark.
Ready in 15 minutes, this simple, no-bake technique requires only a microwave and basic chilling time.
The intense contrast of creamy white chocolate, rich dark chocolate, and crunchy Oreo pieces creates irresistible depth and texture.
Dazzling pink and red drizzles transform simple chocolate into a festive, photo-worthy centerpiece perfect for gifting your loved ones.
Easily customized with various sprinkles and candy melts, this recipe is incredibly versatile, making it ideal for any holiday or themed party.
Ingredients for Valentine’s Day Oreo Cookie Bark
Here’s what you’ll need to make this delicious dish:
- Oreo CookiesWe use about 36 sandwich cookies, roughly chopped, but reserve a few whole ones for decorative placement on top.
- White Melting WafersThese are crucial for the base of the bark; ensure you choose high-quality wafers specifically designed for melting to guarantee a smooth, glossy finish.
- Dark or Semi-Sweet Chocolate ChipsA smaller amount of darker chocolate adds a wonderful depth of flavor, contrasting beautifully with the sweetness of the white chocolate base.
- Pink and Red Candy MeltsThese specific melting discs are used solely for the decorative drizzle and provide vibrant, festive coloring without needing added food dyes.
- Assorted SprinklesChoose Valentine’s themed sprinkles—hearts, red, pink, and white jimmies—to add visual texture and a final celebratory touch to your sweet slab.
The full ingredients list, including measurements, is provided in the recipe card directly below.
How to Make Valentine’s Day Oreo Cookie Bark
Follow these simple steps to prepare this delicious dish:
Step 1: Prepare Your Workspace and Crush the Cookies
Line a standard 9×13 inch baking sheet with parchment paper or a silicone mat. This step is non-negotiable, as it ensures your bark releases cleanly without sticking. Roughly chop approximately 30 of the Oreo cookies into medium-sized chunks; a combination of coarse crumbs and larger pieces offers the best texture in the final bark. Set aside a handful of these crushed pieces for topping.
Step 2: Melt the Chocolate Base
Combine the white melting wafers and the dark chocolate chips in a large, microwave-safe bowl. Heat the mixture in 30-second intervals, stirring vigorously after each interval. Chocolate holds its shape even when melted, so stir thoroughly to check consistency. Stop heating once only a few small lumps remain, and continue stirring until the mixture is entirely smooth and glossy.
Step 3: Assemble the Cookie Base
Pour the melted chocolate mixture onto the prepared baking sheet. Use an offset spatula or the back of a spoon to quickly spread the chocolate into a thin, even layer across the entire sheet, aiming for about a quarter-inch thickness. While the chocolate is still wet, immediately scatter the crushed Oreo pieces evenly over the surface. Gently press a few whole or half Oreos into the chocolate if desired for added visual appeal.
Step 4: Create the Festive Drizzle
In two separate, small bowls, melt the pink and red candy melts individually following the same 30-second interval method. Once smooth, transfer each color into its own small piping bag or a zip-top bag with a tiny corner snipped off. Drizzle the pink melt across the bark in tight, diagonal lines, then repeat the process with the red melt, creating a vibrant, crisscross pattern.
Step 5: Chill and Set the Bark
Immediately after drizzling, scatter your chosen Valentine’s Day sprinkles generously over the top of the wet chocolate. Transfer the baking sheet to the refrigerator and allow the bark to chill completely for at least 1 to 2 hours, or until the chocolate is firm and snaps cleanly. Once firm, slide the bark off the pan onto a cutting board.
Step 6: Break and Serve
Using a large, sharp knife or simply your hands, break the chilled slab into irregular pieces of various sizes. The rustic, jagged edges are part of the charm of thisValentine’s Day Oreo Cookie Bark. Transfer to plates and arrange attractively for the perfect finishing touch.
Why This Recipe is Your Valentine’s Day Secret Weapon
Let us be honest, February 14th often brings a distinct flavor of performance anxiety. You feel compelled to produce a meal worthy of a Michelin star or craft a gift that rivals a jeweler’s display. If you, like me, once tried to make soufflé only to end up with an expensive, eggy pancake, you understand the need for reliable shortcuts.
This recipe is the culinary equivalent of turning up in sweatpants when everyone else wore a tuxedo—it’s comfortable, it’s low-stress, and everyone secretly wishes they had done the same. The beauty of chocolate bark lies entirely in its effortlessness. There’s no tempering needed, no finicky baking temperatures, and the more rugged and messy the final product looks, the better. You simply melt, spread, decorate, and break. It provides maximum romantic payoff for minimal culinary input, freeing up crucial time for other Valentine’s necessities, like finding the remote control or arguing about what movie to watch.
Furthermore, crafting this treat allows for a great deal of personalization. While the Oreos provide the mandatory crunch, the vast expanse of white chocolate is your blank canvas. You can tailor the colors and sprinkles to the recipient’s favorite aesthetic or even swap out the Oreos for other crunchy cookies if you feel adventurous. This simple, deliciousValentine’s Day Oreo Cookie Barkgenuinely feels homemade and thoughtful without requiring you to hire a professional pastry chef.
Choosing Your Chocolate Canvas
The foundation of any great bark recipe hinges entirely on the quality and type of melting agent you select. Avoid standard baking chocolate chips for the base, as these often contain stabilizers that prevent them from melting into a truly smooth, glossy sheen required for easy spreading and a clean snap. Instead, always opt for dedicated melting wafers, also sometimes labeled as compound chocolate or confectionary coating.
White chocolate, in particular, can be notoriously difficult to handle. It scorches easily and can seize—meaning it turns into a thick, unusable paste—if it comes into contact with even a tiny drop of water. When melting your base for this cookie bark, use a dry, clean bowl and always rely on the low power settings of your microwave, working in short, controlled bursts. Continuous stirring is key; the residual heat held by the chocolate is often enough to eliminate the last few stubborn lumps without risking overheating the entire batch. Using high-quality wafers ensures a beautiful, smooth base that sets up perfectly crisp, providing that satisfying snap that defines good chocolate bark.
Customizing Your Cookie Bark for Any Occasion
While the combination of Oreos and pink/red drizzles screams Valentine’s Day, the versatility of the simple chocolate bark structure makes it an ideal treat for virtually any holiday or gathering. You can effortlessly adapt this recipe just by swapping out colors and inclusions.
Seasonal Swaps for Different Holidays
For march celebration, swap the pink melts for green, incorporate mint-flavored cream cheese sandwich cookies, and use gold sprinkles. For summer BBQs, you could use bright blue and yellow candy melts, mix in lemon cookies, and add toasted coconut flakes for a tropical flair. During the winter holidays, use traditional dark chocolate as the base, swirl in some green and red melts, and include crushed candy canes instead of cookies for a festive peppermint bark.
Adding Extra Crunch and Flavor
If you want to move beyond the traditional cookie crunch, consider incorporating other mix-ins. Small, toasted nuts like pecans or almonds add a sophisticated depth of flavor and texture. Dried fruit pieces, such as dried cherries or small raisins, pair exceptionally well with dark chocolate, offering a chewy contrast. Just ensure that whatever you add is completely dry before mixing it into the melted chocolate base, as moisture is the enemy of perfectly smooth chocolate.
Troubleshooting Common Bark Blunders
Even though chocolate bark is one of the easiest confections to master, a few common mistakes can derail your dessert. Knowing how to prevent or fix these issues ensures yourValentine’s Day Oreo Cookie Barkis perfect every time.
What causes the chocolate to seize or become grainy?
Seizing occurs almost instantly when the melted chocolate encounters moisture—even steam or a drop of water. To prevent this, ensure all your bowls and utensils are perfectly dry. If your chocolate does seize, you might be able to save it by vigorously stirring in a tablespoon of neutral oil (like vegetable or canola oil). This emulsifies the mix, sometimes returning it to a manageable consistency, though the finished texture might be slightly softer.
How to achieve the perfect marble swirl?
To create an attractive, integrated marble swirl rather than distinct lines, you must work quickly while the base chocolate is still wet. After drizzling the colored melts over the base, take a toothpick, skewer, or the tip of a small knife and gently run it through the lines. Do not stir too deeply or aggressively; only move the tip through the top layer to lightly blend the colors. Stopping after only a few passes preserves the contrast and definition.
How long does homemade bark last?
When stored correctly, this cookie bark has a surprisingly long shelf life. Once completely set, transfer the pieces into an airtight container. Keep the container in a cool, dry place, away from direct sunlight, at room temperature for up to two weeks. Avoid storing it in the refrigerator unless your kitchen is extremely warm, as frequent temperature changes can cause the chocolate to develop a whitish bloom (a harmless but unattractive fat or sugar crystallization).
Serving Suggestions for Your Romantic Treat
The beauty of thisValentine’s Day Oreo Cookie Barkis its adaptability. Serve the bark piled high on a decorative platter for a festive finish to a romantic dinner, or wrap individual pieces in cellophane bags tied with ribbon for charming, homemade gifts. This chocolate slab also makes a fantastic ice cream topping—just crumble a piece over vanilla bean ice cream for an immediate upgrade. Whether you share it or secretly devour the whole batch yourself, this simple sweet treat will make your Valentine’s Day absolutely perfect.
Perfecting the Cooking Process

Achieve optimal results by focusing on temperature control. First, ensure the chocolate is melted slowly to prevent scorching. Next, spread the base layer and immediately add the Oreos so they stick firmly. The swirling should happen quickly after applying the second color layer, maximizing marbling before the chocolate sets.
Add Your Touch
If you prefer a deeper flavor profile, swap the milk chocolate drizzle for dark chocolate chips, or infuse the white chocolate with a drop of pure alcohol-free vanilla extract. For extra crunch, include roasted chopped pistachios or dried cranberries alongside the Oreo pieces. Use freeze-dried raspberry powder for a natural pink color.
Storing & Reheating
Since bark requires no reheating, storage is simple. Keep the finished bark in an airtight container at room temperature for up to one week, or in the refrigerator for two weeks. If refrigerated, allow it to sit at room temperature for 15 minutes before serving for the best texture and flavor release.
The Annual Panic: Why You Need a Zero-Effort Dessert
February rolls around, and suddenly the pressure is on. You need romance, ambiance, and, critically, a dessert that screams “I love you” without actually requiring you to spend two full days wrestling with a delicate soufflé. I remember one disastrous Valentine’s Day attempting to create heart-shaped strawberry tarts. They looked less like symbols of eternal devotion and more like tiny, angry, red blobs. The whole effort defeated the purpose of a relaxing evening and left me stressed and covered in flour.
That is precisely why I perfected the ultimate relationship-saver: the Valentine’s Day Oreo Cookie Bark. It’s magnificent, requires virtually no actual baking, and involves simply melting chocolate and smashing cookies—activities proven scientifically to reduce stress. It delivers maximum romantic impact for minimum effort, allowing you to focus on the truly important things, like finding the perfect movie to binge-watch together.
Ingredients for the Perfect Sweet Treat
This recipe is ridiculously simple. If you can melt chocolate without setting off the fire alarm, you are absolutely qualified to make this confection. We are focusing on quality chocolate and, of course, the king of cream-filled biscuits to construct this fantastic treat.
- 3 cups high-quality white chocolate melting wafers or chips
- 1 cup milk chocolate chips or dark chocolate wafers
- 20 Oreo cookies (about half a standard package), roughly chopped
- 1/2 cup love day themed sprinkles (red, pink, and white)
- 1/4 teaspoon pink or red food coloring (ensure it is oil-based)
- Optional: 2 tablespoons vegetable shortening (to thin the chocolate if a smooth melt is elusive)
Tools of the Trade
You don’t need fancy equipment, just a solid baking sheet and some patience while waiting for the chocolate to chill and set up completely.
- Large baking sheet (10×15 inches recommended)
- Parchment paper or silicone baking mat
- Double boiler or microwave-safe bowls for melting chocolate
- Rubber spatula and a small offset knife for swirling
Step-by-Step Guide to Cookie Bark Glory
Get ready for the easiest romantic recipe you will ever make. The key to a fantastic Valentine’s Day Oreo Cookie Bark is achieving dynamic layers and great texture contrast. Do not rush the cooling process; the crunch is absolutely essential for perfection.
First, line your baking sheet with parchment paper. This step is completely non-negotiable unless you enjoy the tedious activity of scraping solidified chocolate off metal for an hour straight. Next, roughly chop your Oreo cookies. We aren’t looking for fine dust here; we want chunky, identifiable pieces that offer substantial texture. Set all of these beautiful chunks aside.
Now, melt the white chocolate. If using the microwave, heat in 30-second intervals, stirring vigorously and scraping the sides between each session until the mixture is perfectly smooth and glossy. Once melted, divide the white chocolate into two perfectly equal bowls. Keep one bowl plain white and pristine. In the second bowl, stir in a tiny drop of the oil-based red or pink food coloring until you achieve a dreamy, rosy hue that screams romance. This pink chocolate is the backbone of your romantic dessert display.
Spread the plain white chocolate onto the prepared baking sheet in a thin, even layer. It should cover the base but not be excessively thick. While the white chocolate is still completely wet, sprinkle half of your crushed Oreos generously over the base layer. Give it a minute to slightly settle, then drizzle the melted pink chocolate randomly across the white surface. Immediately swirl the pink and white layers gently using a knife or toothpick to create a marbled, abstract-art effect. Be careful not to mix the colors too much; you are aiming for distinct ribbons of color.
Melt your milk chocolate and place it into a piping bag or a standard zip-top bag with a tiny corner snipped off. Drizzle the milk chocolate back and forth haphazardly over the pink and white base. Finally, sprinkle the remaining Oreos and all of the festive sprinkles generously across the top before the chocolate hardens completely. Press the toppings lightly into the chocolate to ensure firm adhesion. Place the tray in the refrigerator for at least two hours, or until the entire slab is completely firm. Once fully set, break the large, colorful slab into irregular, gorgeous pieces. Now you have a dessert that looks like abstract art and tastes like pure bliss. This magnificent Valentine’s Day Oreo Cookie Bark will certainly impress your loved ones with minimal effort.
My sister once used this recipe for a last-minute office party, and everyone thought she bought it from a high-end chocolatier. It confirmed that high-impact desserts do not require high-effort preparation.
Why Bark is Better Than Truffles: Texture and Taste
While truffles are undeniably lovely, they require delicate rolling, consistent sizing, and precise temperature management, which is often too much work for a romantic evening. Bark, on the other hand, celebrates glorious imperfection. The uneven edges and varied thickness throughout the piece create a spectacular, crunchy textural experience, combining the silky melt of the chocolate with the substantial, crunchy depth of the Oreo pieces. This contrast is exactly what makes the Valentine’s Day Oreo Cookie Bark so completely addictive.
When you break the bark, each individual piece is a unique mosaic of pink, white, and dark chocolate, speckled with appealing cookie crumbs and shimmering sprinkles. It offers a beautiful, rustic charm that is often entirely missing from overly fussy, perfectly symmetrical desserts. Plus, the ease of cleanup—just peel the parchment paper and you’re essentially done—makes it a clear, undeniable winner for any celebratory evening where you would much rather be relaxing and enjoying company than scrubbing complicated pots and pans.
We often mistakenly assume that gourmet must equate to complex techniques, but the reality is that the most memorable recipes are often those that highlight simple, quality ingredients. Using good melting chocolate here makes a monumental difference in the final product. Avoid compound chocolates if possible, and opt instead for true couverture or high-quality chips specifically designed for smooth melting. This choice ensures a glossy, professional finish and a satisfying snap when you break the finished product. This approach guarantees that your homemade Valentine’s Day Oreo Cookie Bark tastes as spectacular as it looks.
Expert Tips for Flawless Cookie Bark
My first attempt at chocolate bark resulted in a thick, lumpy mess that was far from appetizing. Over the years, I learned these simple secrets for perfect, glossy results every time you make bark.
- Always use oil-based food coloring when tinting chocolate; water-based colors will cause the chocolate to seize and turn grainy instantly.
- Do not handle the bark with warm hands after it sets; use kitchen gloves or work quickly when breaking the bark to prevent smudges and melting.
- If your kitchen runs warm, chill the chopped Oreos slightly before sprinkling them on; this prevents them from accelerating the melting of the wet chocolate base.
Troubleshooting Common Bark Blunders
Even though this recipe is incredibly straightforward, a few common issues can trip up the amateur confectioner. Knowing how to fix or avoid them ensures your results are always stunningly beautiful.
Why did my chocolate seize?
Chocolate seizes (becomes thick, lumpy, and grainy) when even a tiny drop of water or steam comes into contact with it during the melting process. Ensure all your bowls and tools are completely dry, and if using a double boiler, make sure the water is simmering gently, not boiling vigorously and spitting steam onto the chocolate.
My bark isn’t snapping; it’s just bending. Why?
Bending usually means the chocolate hasn’t fully set, or the layer is simply too thin. Ensure you chill the bark for the full two hours, ideally in the back of the refrigerator where the temperature is coldest. If the layer is too thin (less than 1/4 inch thick), it may not achieve that satisfying, hallmark snap of proper bark.
Can I use regular food coloring instead of oil-based?
No, please do not! Regular gel or liquid food coloring is water-based and will instantly ruin your chocolate by causing it to seize into an unusable paste. You must use specialty oil-based colors, usually found in the baking aisle, to safely tint any melted chocolate mixture without destroying its essential texture.
What is the best way to break the bark neatly?
If you want neater pieces, score the bark lightly with a sharp knife just as it begins to set—about 30 minutes into the chilling process. If you prefer the rustic, random look (which I highly encourage!), simply use your hands once it is fully chilled. Press down firmly on different points to create natural, beautiful segments of Valentine’s Day Oreo Cookie Bark.
Creating homemade treats like this fantastic Valentine’s Day Oreo Cookie Bark elevates the holiday experience without adding undue stress. Enjoy the therapeutic process of smashing those cookies and creating something truly beautiful and deliciously simple for those you cherish!
The Easiest Way to Win love day (No Baking Required)
Ah, Valentine’s Day. The holiday that requires you to demonstrate maximum affection with minimum effort, usually while simultaneously battling dinner reservations and existential dread. If you’ve ever found yourself staring blankly at a box of overpriced chocolates and thinking, “I could do better,” you were right. You absolutely can. Forget the soufflés and the complicated truffles; we are diving headfirst into the world of easy, crunchy, and utterly addictive chocolate bark. This recipe is the emergency parachute for V-Day gifting.
Thisfestive chocolate barkdelivers maximum crunch and vibrant pink and red hues, making it look incredibly complicated, yet it takes about 15 minutes of active time. It’s the perfect solution when you realize you forgot to buy a gift and now only have four hours until date night. Prepare yourself for the simplest, most delightful chocolate experience you will ever encounter: the legendary Valentine’s Day Oreo Cookie Bark.
Why This Crunchy, Sweet Treat Is Your Valentine V-Weapon
The secret to this recipe’s success lies in its textural genius. You have the smooth, creamy sweetness of tempered chocolate or candy melts contrasted against the delightful grit and crunch of crushed chocolate sandwich cookies. It’s a sensory overload in the best possible way. Plus, it’s completely foolproof. If you can melt chocolate without burning your house down, you can master this bark.
Getting Started: Essential Ingredients
You only need a few simple components to create this high-impact dessert. Keep your ingredient list simple and your colors vibrant!
- 16 oz (about 450g) high-quality white melting chocolate or vanilla candy melts
- 6 oz (about 170g) pink and/or red candy melts (or colored white chocolate)
- 2 cups crushed chocolate sandwich cookies (Oreo cookies or similar brand)
- 1/2 cup festive red, pink, and white sprinkles
Pro Tips for Perfect Candy Melt Magic
Working with melting chocolate and candy melts is easy, but speed is key. Ensure all your ingredients—the crushed cookies, the sprinkles, and your lined baking sheet—are ready before you start melting. Chocolate sets quickly, and you need to embed those decorations while the chocolate is still glossy and tacky. Always melt your chocolate low and slow, whether using a double boiler or a microwave, stirring frequently. If the chocolate gets too hot, it can seize up and become grainy, and nobody wants grainy Valentine’s chocolate.
How to Create Your Festive Valentine’s Day Oreo Cookie Bark (The Step-by-Step Guide)
Prep Work: Crush and Line
First, line a large rimmed baking sheet (about 10×15 inches) with parchment paper or a silicone mat. This prevents sticking and makes cleanup a breeze. Next, tackle the cookies. You can crush the chocolate sandwich cookies by placing them in a sealed plastic bag and attacking them with a rolling pin (excellent stress relief), or by pulsing them quickly in a food processor until they resemble coarse gravel. Set aside about half a cup of the crushed cookies for decoration later, and spread the rest evenly over the prepared baking sheet.
The Melt and Swirl Phase
Melt your main quantity of white chocolate or vanilla candy melts until perfectly smooth. Pour the melted white chocolate evenly over the layer of crushed cookies on the sheet pan, using an offset spatula to spread it quickly into a smooth, thin layer. Next, melt the pink and/or red candy melts in a separate bowl. Once melted, drizzle the colored chocolate generously over the white base. Use a toothpick or skewer to gently swirl the colored chocolate into the white base, creating beautiful marbled patterns. Do not overmix; you want defined colors, not a muddy blend.
The Decoration Frenzy
Once you achieve that mesmerizing swirl, immediately scatter the remaining reserved crushed cookies over the top of the wet chocolate. Follow this swiftly by tossing on your favorite festive sprinkles and candy decorations. Press the decorations down lightly with the back of a spoon to ensure they adhere firmly to the chocolate before it begins to set. Allow the bark to cool completely at room temperature or chill it in the refrigerator for about 30 to 45 minutes until fully hardened. Once set, break the large slab into satisfyingly jagged, edible shards.
Troubleshooting and Customization Ideas
If your chocolate seems too thick to spread, add a small teaspoon of neutral oil (like refined coconut oil) or shortening to the mix and stir until smooth—this helps thin it out slightly. If you prefer a richer flavor, you can use milk or dark chocolate as the base instead of white chocolate. For additional crunch, consider mixing in chopped roasted peanuts or sliced almonds. If you want a more complex flavor profile, add a dash of pure alcohol-free vanilla extract or a small amount of freeze-dried strawberry powder to the white chocolate before spreading. You can easily adjust this bark recipe for any holiday simply by changing the colors of the melts and the style of the sprinkles, making it a year-round favorite.
Conclusion for Valentine’s Day Oreo Cookie Bark
This recipe for Valentine’s Day Oreo Cookie Bark is proof that maximum romantic impact doesn’t require a maximum amount of effort. Combining the satisfying crunch of crushed cookies with smooth, swirled chocolate, this festive treat offers both stunning presentation and irresistible flavor. It is fast, flexible, and completely customizable, making it the perfect homemade confection for celebrating the season of love. Whether you are gifting individual shards or keeping the entire batch for a cozy night in, this simple cookie bark guarantees a delightfully sweet and crunchy success.
PrintValentine’s Day Oreo Cookie Bark

Dive into this simple, gorgeous Valentine’s Oreo Bark! We combine crunchy cookie pieces with creamy white chocolate, then marble it with dark chocolate and vibrant festive drizzles.
- Prep Time: 15 minutes
- Cook Time: 20 minutes
- Total Time: 35 minutes
- Yield: 4 servings
- Method: Stovetop
- Cuisine: American
Ingredients
- Oreo CookiesWe use about 36 sandwich cookies, roughly chopped, but reserve a few whole ones for decorative placement on top.
- White Melting WafersThese are crucial for the base of the bark; ensure you choose high-quality wafers specifically designed for melting to guarantee a smooth, glossy finish.
- Dark or Semi-Sweet Chocolate ChipsA smaller amount of darker chocolate adds a wonderful depth of flavor, contrasting beautifully with the sweetness of the white chocolate base.
- Pink and Red Candy MeltsThese specific melting discs are used solely for the decorative drizzle and provide vibrant, festive coloring without needing added food dyes.
- Assorted SprinklesChoose Valentine's themed sprinkles—hearts, red, pink, and white jimmies—to add visual texture and a final celebratory touch to your sweet slab.
Instructions
- Step 1: Prepare Your Workspace and Crush the Cookies
- Step 2: Melt the Chocolate Base
- Step 3: Assemble the Cookie Base
- Step 4: Create the Festive Drizzle
- Step 5: Chill and Set the Bark
- Step 6: Break and Serve
Notes
- For optimal freshness and a satisfying snap, store the bark in an airtight container at cool room temperature away from direct sunlight for up to 7 days.
- If you refrigerate the bark for extended storage, let it sit out for 10 to 15 minutes before breaking and serving so the chocolate is not overly hard and the flavor profile is fully expressed.
- This festive bark makes a wonderful, crunchy topping when crumbled over vanilla bean ice cream or served alongside a hot mug of cocoa.
- Chef's Tip: Use high-quality white melting wafers, as directed, and ensure they are fully melted and glossy before incorporating the chopped Oreos for the smoothest base layer.
Nutrition
- Serving Size: 1 piece (approx. 1.3 oz / 38g)
- Calories: 200
- Sodium: 75mg
- Fat: 11g
- Saturated Fat: 7g
- Trans Fat: 0.1g
- Protein: 22g
FAQs
How do I store leftover cookie bark to keep it fresh?
Storing your finished cookie bark correctly ensures that its delightful crunch and vibrant colors last. Once the bark is fully set, break it into pieces and store it in an airtight container at cool room temperature. Avoid placing it near heat sources, as this can cause the chocolate to bloom or melt. If your kitchen is very warm, the refrigerator is acceptable, but ensure the container is sealed tightly to prevent moisture absorption. Properly stored, this sweet treat will remain fresh and tasty for up to two weeks, though we doubt it will last that long!
Can I use regular chocolate chips instead of candy melts for this Valentine’s Day Oreo Cookie Bark?
Yes, you can absolutely use standard chocolate chips, but be aware of the difference in texture and setting time. Candy melts are formulated to set quickly and hold color without needing specific tempering. If you use white chocolate chips, they may require a small addition of shortening or refined coconut oil (about one teaspoon per cup) to ensure they spread thinly and provide a glossy finish. This addition helps prevent the chocolate from seizing and makes the resulting Valentine’s Day Oreo Cookie Bark smoother and easier to break.
What is the fastest way to prepare cookie bark for a large group?
If you need to scale up your production of this delicious bark recipe, efficiency is key. Prepare multiple sheet pans ahead of time, lining them all simultaneously. Use a large food processor to crush all the required chocolate sandwich cookies in one quick batch. When melting the chocolate, use a large microwave-safe bowl or a double boiler setup to handle bigger quantities. After swirling and decorating the sheets, place them directly into the freezer. The bark will be perfectly solid and ready to break in 20 minutes or less, significantly speeding up the process.
How can I ensure my colored swirls look professional and not messy?
Achieving a beautiful, professional swirl on your chocolate bark requires a delicate hand. First, ensure the white base layer is fully spread but still warm and glossy. Drizzle the accent colors (pink/red) in continuous, thin streams across the surface. Then, take a wooden skewer or a thin knife and gently pull it through the colored chocolate, creating wide S-shapes or figure eights. Avoid aggressive stirring or scraping the bottom layer. The goal is to gently blend the top colors without fully mixing them into the base, preserving the marble effect of the Valentine’s Day Oreo Cookie Bark.


Leave a Comment