
The mere mention of classic deviled eggs sparks a happy memory, a delightful whisper of gatherings and good times. That first bite, a creamy homemade filling bursting with tangy richness inside a tender egg white, is pure, unadulterated joy. These humble yet iconic bites are universally loved, an easy appetizer recipe that always vanishes first from any spread. Get ready to create your own perfectly balanced, utterly irresistible version.
- Experience the ultimate creamy homemade filling, a velvety delight that melts in your mouth and leaves you craving more of these classic deviled eggs.
- This recipe is a breeze to prepare, making it the perfect easy appetizer recipe for impromptu get-togethers or elegant celebrations.
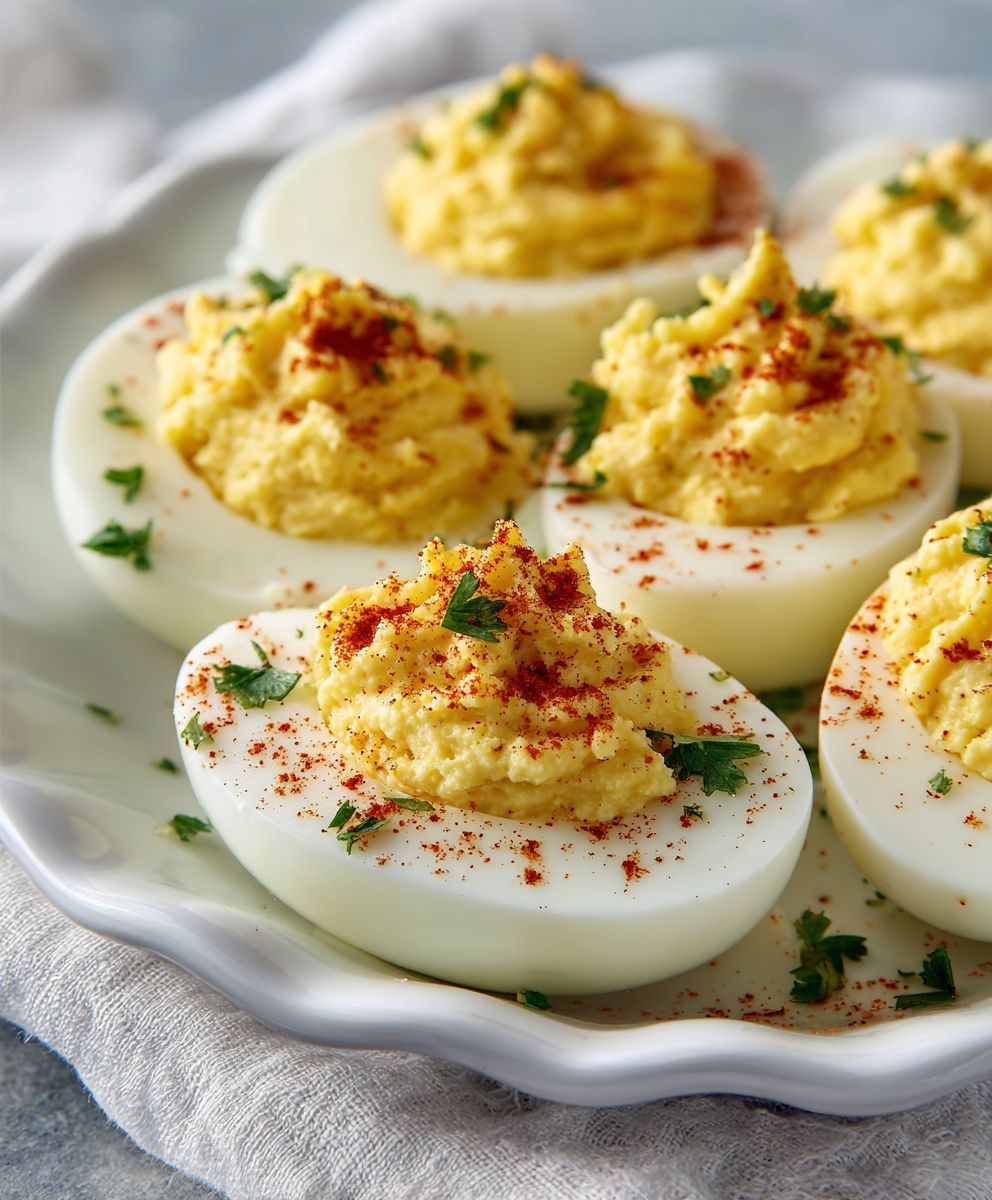
- The vibrant golden filling nestled in pristine white egg halves creates a stunning visual appeal that brightens any serving platter.
- Classic deviled eggs are wonderfully versatile, offering endless possibilities for subtle customizations to perfectly match any taste preference.
The Enduring Charm of Classic Deviled Eggs
There’s a special place in the culinary hall of fame for classic deviled eggs. They’re not just a dish; they’re a rite of passage for many home cooks, a symbol of effortless elegance, and often the unsung hero of any buffet. I recall my Aunt Betty’s famous deviled eggs; she swore they were simply “eggs and a few things,” but every year, her platter would be raided within minutes. Her secret? A perfectly balanced, creamy homemade filling that made this easy appetizer recipe utterly addictive. They embodied comfort and a touch of mischief, always disappearing before anyone had their fill.
What makes these delicate bites so universally adored? Perhaps it’s the nostalgic connection to family gatherings, or maybe it’s the sheer delight of their texture – that smooth, rich filling contrasting with the firm egg white. Whatever the magic, classic deviled eggs have an undeniable gravitational pull. They represent simple ingredients elevated to something truly spectacular, proving that you don’t need complexity to create culinary joy. Prepare yourself for compliments, because once you master this easy appetizer recipe, your deviled eggs will become legendary too.
Mastering the Perfect Hard-Boiled Egg for Your Classic Deviled Eggs
The foundation of any spectacular deviled egg recipe begins with a perfectly cooked and easily peelable hard-boiled egg. This might sound like a simple task, but anyone who has wrestled with a stubborn, shell-shredding egg knows it can be a true test of patience. My trick for flawless eggs, ready for their creamy homemade filling, involves a method that minimizes frustration and maximizes smooth, beautiful whites. Start with eggs that are a few days old, as fresher eggs tend to cling more tenaciously to their shells. This small detail is often overlooked but makes a significant difference.
To achieve consistently perfect hard-boiled eggs, place them carefully in a single layer in a saucepan. Cover them with cold water, ensuring there’s about an inch of water above the eggs. Bring the water to a rolling boil over high heat, then immediately remove the pan from the heat, cover it tightly, and let the eggs sit undisturbed for precisely 10-12 minutes. The exact time depends on your desired yolk firmness. Following this, promptly transfer the eggs to an ice bath for at least 5 minutes. This abrupt temperature change stops the cooking process and helps the shell separate effortlessly, preparing them for your classic deviled eggs.
Crafting the Irresistible Creamy Homemade Filling
Now, we arrive at the heart of this easy appetizer recipe: the creamy homemade filling. This is where you transform simple egg yolks into a velvety, flavorful mixture that will have everyone reaching for seconds. Achieving the perfect texture and taste requires attention to detail. Start by mashing the cooked yolks until they are completely smooth. Any lumps will detract from the luxurious mouthfeel we’re aiming for, so take your time with this step. A fork works perfectly for mashing, ensuring a consistent texture throughout.
Once the yolks are mashed, it’s time to introduce the supporting cast of ingredients that create that signature tangy and rich flavor. The blend of mayonnaise, Dijon mustard, and a touch of white vinegar provides the essential creaminess and zest. Seasoning with salt and black pepper is crucial for enhancing all the flavors. Don’t be afraid to taste and adjust! A little more mustard for extra zing, a pinch more salt to brighten, or another dash of vinegar for sharpness can make all the difference. This creamy homemade filling is what truly sets your classic deviled eggs apart.
Ingredients for Classic Deviled Eggs | Creamy Homemade Filling Easy Appetizer Recipe
Here’s what you’ll need to make this delicious dish:
- Large EggsSelect eggs that are a few days old for easier peeling after cooking, ensuring smooth, unblemished egg whites.
- MayonnaiseUse a good quality, full-fat mayonnaise to achieve the richest, most luxurious creamy texture for your filling.
- Dijon MustardThis adds a essential tangy kick and a complex flavor note that defines classic deviled eggs.
- White VinegarJust a small amount brightens the overall flavor profile, cutting through the richness with a pleasant acidity.
- SaltCrucial for seasoning, it balances and enhances all the flavors within the creamy homemade filling.
- Black PepperFreshly ground black pepper provides a subtle warmth and aromatic depth to the appetizer.
- PaprikaUsed primarily as a garnish, it adds a beautiful contrasting color and a hint of mild flavor, especially if using smoked paprika.
- Fresh Chives or Parsley(Optional) Finely chopped herbs can be sprinkled on top for a burst of fresh flavor and an elegant visual touch.
The full ingredients list, including measurements, is provided in the recipe card directly below.
How to Make Classic Deviled Eggs | Creamy Homemade Filling Easy Appetizer Recipe
Follow these simple steps to prepare this delicious dish:
Step 1: Hard-Boil and Peel the Eggs
Carefully place your eggs in a single layer in a large saucepan, covering them with cold water by about one inch. Bring the water to a rolling boil over high heat, then immediately remove the pan from the heat, cover it, and let the eggs sit for 10-12 minutes. Prepare an ice bath. After sitting, transfer the eggs immediately to the ice bath for at least 5 minutes to cool completely. Once cool, gently tap and roll each egg to crack the shell, then peel under cool running water, discarding the shells.
Step 2: Halve Eggs and Separate Yolks
Once peeled, carefully slice each hard-boiled egg in half lengthwise with a sharp knife. Gently scoop out the yellow yolks into a medium-sized mixing bowl, taking care not to tear the egg whites. Place the empty egg white halves onto your serving platter or a clean plate, ready for the creamy homemade filling.
Step 3: Create the Creamy Homemade Filling
Using a fork, thoroughly mash the egg yolks until they are completely smooth and free of any lumps. Add the mayonnaise, Dijon mustard, white vinegar, salt, and black pepper to the mashed yolks. Mix everything together really well, either with a fork or a small spatula, until the mixture is fully combined and lusciously creamy. Taste the filling and adjust seasonings as needed to perfect the flavor of your classic deviled eggs.
Step 4: Fill the Egg Whites
For a beautiful presentation, transfer the creamy homemade filling to a piping bag fitted with a star tip (or a sturdy plastic bag with a corner snipped off). Pipe the filling neatly into each egg white half, creating an attractive swirl or mound. If you prefer a more rustic look, you can simply use a small spoon to dollop the filling into each cavity. Ensure each egg white is generously filled for a truly satisfying bite from this easy appetizer recipe.
Step 5: Garnish and Chill
Once all the egg whites are filled, lightly dust each deviled egg with paprika for a pop of color and a hint of flavor. If desired, you can also sprinkle finely chopped fresh chives or parsley over the top for added freshness and visual appeal. Cover the platter loosely with plastic wrap and refrigerate the classic deviled eggs for at least 30 minutes to allow the flavors to meld and for them to chill thoroughly before serving. Serve your perfectly chilled classic deviled eggs as a delightful appetizer or side dish. They are best enjoyed fresh!
Tips for Deviled Egg Perfection
While the recipe for classic deviled eggs is straightforward, a few expert tips can elevate your creation from good to absolutely unforgettable. Achieving that silken texture in your creamy homemade filling is paramount. Ensure your yolks are mashed to an incredibly smooth consistency before adding any other ingredients; even small lumps can disrupt the mouthfeel. Don’t rush this step, as it forms the foundation of a truly luxurious filling. Secondly, the quality of your mayonnaise truly matters. A high-quality, full-fat mayonnaise will provide the richest flavor and creamiest texture, making your easy appetizer recipe shine.
Another crucial tip is the art of tasting and adjusting. Your palate is your best guide. After mixing your creamy homemade filling, take a small taste. Does it need more tang? Add a tiny bit more Dijon mustard or vinegar. Is it bland? A pinch more salt can awaken all the flavors. Don’t be shy about seasoning to your preference! For an extra touch of brightness, consider a very small amount of lemon juice or even a dash of hot sauce if you enjoy a subtle kick. Remember, perfecting these classic deviled eggs is a journey of small, delicious adjustments, ensuring every bite is sensational.
Storage and Make-Ahead for Your Easy Appetizer Recipe
Deviled eggs are undoubtedly at their peak freshness when consumed shortly after preparation, but life often calls for strategic planning. The good news is that you can certainly prepare components of this easy appetizer recipe in advance, making party day much less stressful. Hard-boiling and peeling the eggs can be done up to 2 days before you plan to assemble them. Once peeled, store the egg whites in an airtight container in the refrigerator to keep them fresh and ready for filling.
Similarly, the creamy homemade filling can also be made a day ahead. Prepare the filling as directed in the recipe and store it in an airtight container in the refrigerator. If you plan to pipe the filling, you can even load it into a piping bag beforehand, ensuring the ends are tightly sealed to prevent it from drying out. On the day of your event, simply retrieve your prepped egg whites and filling, assemble your classic deviled eggs, garnish, and chill briefly before serving. This make-ahead approach ensures maximum freshness with minimal last-minute effort.
Frequently Asked Questions About Classic Deviled Eggs
How long do classic deviled eggs last in the refrigerator?
Classic deviled eggs are best enjoyed within 1 to 2 days when stored properly in an airtight container in the refrigerator. While they might still be safe to eat after this, their quality, texture, and flavor diminish significantly.
Can I freeze deviled eggs or their creamy homemade filling?
No, freezing deviled eggs or their filling is not recommended. The egg whites become rubbery and watery when frozen and thawed, and the creamy homemade filling can separate, resulting in an unpleasant texture. This easy appetizer recipe is definitely best made fresh or with only short-term refrigeration.
What if my creamy homemade filling is too thick or too thin?
If your creamy homemade filling is too thick, you can thin it out by adding a tiny bit more mayonnaise or a splash of white vinegar, a quarter teaspoon at a time, until it reaches your desired consistency. If it’s too thin, you can carefully mash in a small amount of extra cooked egg yolk or a pinch of dry mustard powder to help thicken it slightly for your classic deviled eggs.
Perfecting the Cooking Process

Achieving perfectly cooked eggs is the cornerstone of great deviled eggs. Begin by gently lowering eggs into boiling water, then immediately reduce heat to a gentle simmer for precisely 12-14 minutes. Afterward, swiftly transfer them to an ice bath; this crucial step stops cooking and makes peeling a breeze for your classic deviled eggs.
Add Your Touch
Elevate your creamy homemade filling with imaginative twists! Consider a pinch of smoked paprika for depth, a dash of hot sauce for a gentle kick, or finely chopped chives for fresh oniony notes. A spoonful of finely minced sweet relish adds delightful texture and flavor contrast to this easy appetizer.
Storing & Reheating
Store deviled eggs loosely covered in an airtight container in the refrigerator for up to two days. For best quality, keep the creamy filling and egg whites separate until just before serving. Deviled eggs are best enjoyed chilled; reheating is not recommended, as their delicate texture and flavor can be compromised.
- Achieve smooth, creamy filling by pushing the yolk mixture through a fine-mesh sieve before mixing. This removes any lumps, ensuring a silky texture every time.
- For easy piping, use a piping bag with a star tip. It makes for beautiful presentation and speeds up assembly for your elegant appetizers.
- Always undercook eggs slightly, then shock in ice water. This prevents the dreaded green ring around the yolk and ensures perfect color.
My Grandma once served deviled eggs at a family reunion, and they vanished faster than a magician’s rabbit. She always said the secret was a dash of unexpected sweetness, and honestly, she was right.
Ah, deviled eggs! That quintessential party snack, the unsung hero of potlucks, and the reason many of us make a beeline for the appetizer table. There’s something undeniably charming about these creamy, savory bites. They’re simple, yet sophisticated enough to impress. Today, we’re not just making deviled eggs; we’re crafting the ultimate classic deviled eggs, focusing on that velvety, creamy homemade filling that makes everyone swoon. Forget those lackluster versions you might have encountered; we’re going for gold, baby!
Why These Classic Deviled Eggs Reign Supreme
So, what makes a deviled egg truly exceptional? It’s a delicate balance, my friends. First, you need perfectly cooked eggs – no rubbery whites, no greenish-gray yolks. Then comes the filling: a creamy, dreamy concoction that strikes the perfect chord between tangy, savory, and just a hint of sweet. This isn’t merely an easy appetizer recipe; it’s a testament to simple ingredients coming together to create something truly magical. They’re quick to assemble, incredibly versatile, and universally loved. Plus, who can resist those perfectly piped, golden mounds? They’re like tiny edible jewels, beckoning you to take a bite.
Making deviled eggs also offers a delightful culinary journey. It’s an opportunity to transform a humble ingredient into a star. Imagine a platter of these beauties gracing your next gathering, disappearing faster than you can say “more please!” This recipe promises a creamy homemade filling that’s rich, smooth, and bursting with flavor. We will guide you through every step, ensuring your deviled eggs are the talk of the town, not just another snack. Let’s dive into creating this delicious, crowd-pleasing dish that combines tradition with irresistible taste.
Gather Your Arsenal: Ingredients for Creamy Homemade Filling
Creating the perfect classic deviled eggs doesn’t require a trip to a specialty store. Most of these ingredients are likely already lurking in your pantry or fridge. Simplicity is key to this easy appetizer recipe, allowing the natural flavors to shine. Make sure your ingredients are fresh for the best results!
- 12 large eggs
- ½ cup mayonnaise (full-fat for the creamiest results!)
- 2 tablespoons yellow mustard
- 1 tablespoon apple cider vinegar
- ¼ teaspoon salt
- ⅛ teaspoon black pepper
- Paprika, for garnish (smoked or sweet, your choice!)
- Optional: finely chopped fresh chives or dill for garnish
The Great Deviled Egg Adventure: Step-by-Step Recipe
Now that we’ve gathered our troops, it’s time to embark on the journey of crafting the ultimate classic deviled eggs. Follow these steps meticulously, and you’ll be rewarded with a creamy homemade filling and perfectly peeled egg whites that will make you proud. This easy appetizer recipe is more art than science, but we’re here to guide your brushstrokes!
- Cook the Eggs to Perfection:Place eggs in a single layer in a large pot. Cover them with cold water by about an inch. Bring the water to a rolling boil over high heat. Once boiling, immediately turn off the heat, cover the pot, and let the eggs sit for precisely 12-14 minutes.
- Ice Bath Immersion:While the eggs are “resting,” prepare an ice bath in a large bowl. After 12-14 minutes, use a slotted spoon to transfer the hot eggs directly into the ice bath. Let them cool completely for at least 10-15 minutes. This stops the cooking process and makes peeling significantly easier.
- Peel with Care:Gently tap each egg on a hard surface to crack the shell all around. Roll the egg between your palms to loosen the shell further. Peel under cool running water, starting from the larger end where an air pocket typically forms. This technique helps the shell slide off cleanly.
- Halve and Scoop:Carefully slice each peeled egg in half lengthwise. Gently scoop out the bright yellow yolks into a medium-sized mixing bowl. Place the pristine egg white halves on a serving platter.
- Craft the Creamy Homemade Filling:To the bowl of egg yolks, add the mayonnaise, yellow mustard, apple cider vinegar, salt, and black pepper. Use a fork to thoroughly mash the yolks and mix all the ingredients until the mixture is completely smooth and creamy. For an extra velvety texture, consider pushing the mixture through a fine-mesh sieve, as discussed in our tips!
- Fill and Garnish:Now for the fun part! You can spoon the creamy filling into each egg white half, but for a more elegant presentation, transfer the filling to a piping bag fitted with a star tip (or just snip the corner off a Ziploc bag). Pipe the filling neatly into each egg white cavity.
- Final Flourish:Lightly dust each deviled egg with paprika for a pop of color and a hint of smoky flavor. If desired, sprinkle with fresh chives or dill.
- Chill and Serve:For the best flavor, cover the platter and chill your classic deviled eggs in the refrigerator for at least 30 minutes before serving.
Beyond the Basic: Exciting Deviled Egg Variations
While the classic deviled egg with its creamy homemade filling is a masterpiece on its own, sometimes it’s fun to explore new flavor frontiers. This easy appetizer recipe is incredibly adaptable, inviting you to experiment and find your next favorite twist. Remember to keep the foundational creamy texture intact, then let your imagination run wild.
- Smoky Chipotle Deviled Eggs:Add a pinch of chipotle powder and a tiny dash of lime juice to the filling for a smoky, zesty kick. Garnish with a thin slice of jalapeño.
- Herbed Garden Delight:Mix in finely chopped fresh herbs like dill, parsley, and chives. A splash of lemon juice brightens the flavors beautifully.
- Tangy Sweet Relish:For those who love a bit of crunch and extra tang, fold in a tablespoon or two of finely minced sweet relish into the creamy homemade filling. This was Grandma’s secret!
- Spicy Sriracha Swirl:For heat lovers, blend in a teaspoon of sriracha sauce to the yolk mixture. A light drizzle of sriracha on top makes for an attractive, fiery garnish.
Troubleshooting Your Way to Deviled Egg Glory
Even the most seasoned home cooks can face a minor hiccup or two. Don’t worry, these creamy deviled eggs are forgiving! Here are some common issues and quick fixes to ensure your classic deviled eggs turn out perfect every time, maintaining that creamy homemade filling quality.
- Rubbery Egg Whites:This usually means you’ve overcooked your eggs. Stick to the precise 12-14 minute simmer time and always transfer to an ice bath immediately.
- Green Ring Around the Yolk:Another sign of overcooking! The green color is harmless but less appealing. The ice bath method prevents this by rapidly cooling the eggs and stopping the sulfur from reacting.
- Filling is Too Runny:You might have added too much mayonnaise or vinegar. To fix, mash an extra cooked egg yolk (if available) into the mixture, or add a tiny bit more dry mustard or a pinch of cornstarch (a tiny pinch!) to thicken it slightly.
- Filling is Too Dry:Easily remedied! Stir in another teaspoon or two of mayonnaise until it reaches your desired creamy consistency. A tiny splash of warm water can also help loosen it.
- Hard-to-Peel Eggs:Very fresh eggs tend to be harder to peel. Using eggs that are a week or two old can make peeling much easier. Also, ensure they are thoroughly cooled in the ice bath.
Frequently Asked Questions About Deviled Eggs
Can I make deviled eggs ahead of time?
Yes, you absolutely can! To maintain peak freshness and prevent the whites from drying out, it’s best to cook and peel the eggs, then prepare the creamy homemade filling. Store the egg whites and the filling separately in airtight containers in the refrigerator. Assemble them no more than a few hours before serving for the best classic deviled eggs experience.
What’s the secret to perfectly smooth deviled egg filling?
The biggest secret is ensuring your egg yolks are completely mashed and free of lumps. Using a fork works well, but for an ultra-smooth, restaurant-quality creamy homemade filling, press the mashed yolk mixture through a fine-mesh sieve or use a food processor. This extra step ensures a truly velvety texture for your easy appetizer recipe.
Why do my deviled eggs have a greenish-gray ring around the yolk?
That greenish-gray ring is sulfur from the egg white reacting with iron in the yolk, typically caused by overcooking. To avoid this, cook your eggs for the recommended time (12-14 minutes), then immediately transfer them to an ice bath to halt the cooking process. This preserves the beautiful yellow color of the yolk.
What if I don’t have a piping bag for the filling?
No piping bag? No problem! Simply use a small spoon to carefully scoop the creamy homemade filling into each egg white cavity. For a slightly neater look, you can spoon the filling into a sturdy plastic resealable bag, snip off one corner, and pipe it out like a makeshift piping bag. It’s still an easy appetizer recipe, even without fancy tools.
Can I use Greek yogurt instead of mayonnaise for the filling?
You can certainly experiment with Greek yogurt! It will result in a tangier, slightly lighter creamy homemade filling. Be aware that the texture might be less rich than with traditional mayonnaise. Start with a smaller amount and adjust to taste, ensuring it still binds the ingredients well for your classic deviled eggs.
There you have it! The definitive guide to creating classic deviled eggs with a creamy homemade filling that will make your taste buds sing. This isn’t just an easy appetizer recipe; it’s a timeless crowd-pleaser, perfect for any occasion from casual picnics to elegant holiday gatherings. So go ahead, whip up a batch, and watch them disappear. Your friends and family will thank you for mastering this delightful dish, and you’ll become the undisputed deviled egg champion of your culinary circle. Happy cooking!
Conclusion for Classic Deviled Eggs | Creamy Homemade Filling Easy Appetizer Recipe
This journey through creating Classic Deviled Eggs, with their irresistibly creamy homemade filling, proves that sometimes the simplest appetizers are the absolute best. This easy appetizer recipe is more than just a dish; it’s a nostalgic bite that consistently steals the show at any gathering, disappearing in record time. From mastering the perfect hard-boiled egg to crafting that velvety smooth filling, you’ve now got the secrets to turn humble eggs into a culinary triumph. So go forth, whip up a batch, and watch them disappear faster than you can say “more deviled eggs, please!” They truly are a timeless, delightful treat for all.
PrintClassic Deviled Eggs | Creamy Homemade Filling Easy Appetizer Recipe

Master classic deviled eggs with our easy recipe! Experience perfectly boiled eggs and a tangy, creamy filling featuring Dijon mustard. Complete instructions and nutritional details await.
- Prep Time: 15 minutes
- Cook Time: 20 minutes
- Total Time: 35 minutes
- Yield: 4 servings 1x
- Method: Stovetop
- Cuisine: American
Ingredients
- 6 large eggs
- 1/4 cup mayonnaise
- 1 teaspoon Dijon mustard
- 1/2 teaspoon white vinegar
- 1/4 teaspoon salt
- 1/8 teaspoon black pepper
- Paprika for garnish
Instructions
- Step 1: Place eggs in a single layer in a saucepan. Cover with cold water by 1 inch. Bring water to a rolling boil over high heat, then immediately remove from heat, cover, and let stand for 10-12 minutes.
- Step 2: While eggs are standing, prepare an ice bath by filling a medium bowl with ice and water. Once the 10-12 minutes are up, carefully transfer the eggs from the hot water to the ice bath using a slotted spoon. Let them cool completely for at least 5 minutes.
- Step 3: Gently tap and roll each cooled egg on a hard surface to crack the shell, then carefully peel under cool running water. Cut each egg lengthwise in half and carefully scoop the yolks into a medium bowl. Place the egg white halves on a serving platter.
- Step 4: Add mayonnaise, Dijon mustard, white vinegar, salt, and black pepper to the bowl with the egg yolks. Mash with a fork until very smooth and creamy, ensuring no large lumps remain. Taste and adjust seasonings if needed.
- Step 5: Spoon or pipe the yolk mixture evenly back into the hollows of the egg white halves. Garnish each deviled egg with a light sprinkle of paprika before serving immediately or refrigerating until ready to serve.
Notes
- For the freshest taste, store your deviled eggs in an airtight container in the refrigerator for up to 2-3 days, but they are truly at their best when enjoyed within 24 hours.
- Deviled eggs are designed to be served chilled or at cool room temperature, so please avoid reheating them as it will negatively impact their delicate texture and flavor.
- Present these delightful bites on a bed of fresh parsley or alongside a vibrant crudités platter for an elegant and inviting appetizer at any gathering.
- For effortlessly perfect peels every time, don't skip the ice bath after cooking; it immediately stops the cooking process and helps the shell separate cleanly from the egg white.
Nutrition
- Serving Size: 1 deviled egg half
- Calories: 72
- Sodium: 121mg
- Fat: 6.2g
- Saturated Fat: 1.4g
- Trans Fat: 0g
- Protein: 0.2g
FAQs
How do I achieve perfectly cooked eggs for my Classic Deviled Eggs?
Achieving the ideal texture for your Classic Deviled Eggs starts with perfectly hard-boiled eggs. A fantastic trick is to place your eggs in a pot, cover them with cold water by about an inch, and bring it to a rolling boil. Once boiling, remove the pot from the heat, cover it, and let it sit for 10-12 minutes. This gentle cooking prevents rubbery whites and avoids any greenish discoloration around the yolk. Immediately transfer them to an ice bath for at least 5 minutes to stop the cooking process and make them delightfully easier to peel. This ensures a smooth, creamy yolk, perfectly ready for that delicious homemade filling.
Can I prepare the creamy homemade filling for these easy appetizer recipe deviled eggs ahead of time?
Absolutely! Preparing the creamy homemade filling in advance is a brilliant time-saver, especially when hosting a gathering. You can boil and peel your eggs, then carefully scoop out the yolks and mix them with all the other delightful ingredients for the filling. Store this creamy mixture in an airtight container in the refrigerator for up to 2 days. Keep the egg white halves separate, also refrigerated, on a platter covered with plastic wrap. When it’s time to serve, simply pipe or spoon the filling back into the whites, garnish, and present your stunning “Classic Deviled Eggs | Creamy Homemade Filling Easy Appetizer Recipe.” It’s an easy appetizer recipe for stress-free entertaining!
What are some fun, non-traditional twists for my Classic Deviled Eggs?
While the “Classic Deviled Eggs | Creamy Homemade Filling Easy Appetizer Recipe” is an undeniable star, don’t shy away from playful variations! For a spicy kick, fold in a pinch of smoked paprika and a dash of your favorite hot sauce into the creamy filling. You could also add finely minced fresh chives or a tiny bit of red onion for a fresh, savory crunch that really brightens the flavor. For a gourmet touch, a sprinkle of everything bagel seasoning or a small dollop of pesto can elevate them beautifully. Remember, the creamy homemade filling is your canvas – get creative and make these easy appetizers uniquely yours!
How do I ensure the best flavor and texture for my Classic Deviled Eggs?
For truly outstanding “Classic Deviled Eggs | Creamy Homemade Filling Easy Appetizer Recipe,” focus on fresh ingredients and proper technique. Start with quality, fresh eggs; they make a noticeable difference in both flavor and texture. Ensure your mayonnaise is fresh and flavorful, as it forms the creamy base for the filling. Don’t be shy with seasonings – a pinch of salt, a dash of mustard, and a hint of vinegar really make the flavors pop. When mixing the creamy homemade filling, mash the yolks until perfectly smooth, avoiding any lumps. Finally, allow the assembled deviled eggs a short chill time in the fridge for the flavors to meld beautifully before serving.


Leave a Comment