

Christmas Chocolate Trees: A Festive Delight
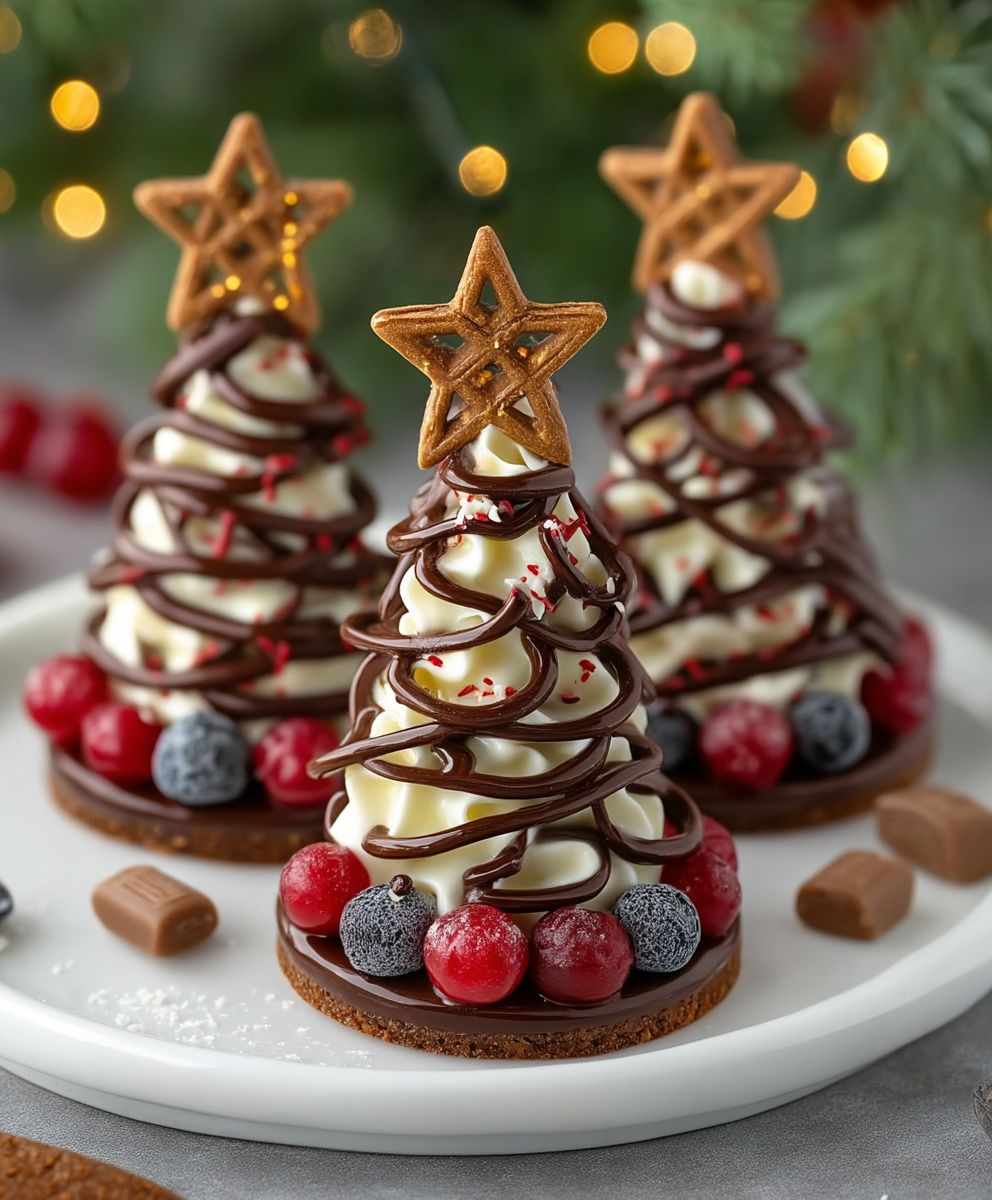
Christmas Chocolate Trees are not just a treat; they are a delightful centerpiece that brings joy and warmth to any holiday gathering. As the festive season approaches, the aroma of melted chocolate and the sight of these charming edible trees can instantly elevate the spirit of celebration. Originating from the tradition of decorating with sweets during the holidays, these chocolate creations have become a beloved staple in many households around the world.
People adore Christmas Chocolate Trees for their rich, velvety taste and the satisfying crunch of the decorations. The combination of smooth chocolate and colorful toppings creates a visual feast that is as enjoyable to make as it is to eat. Plus, they are incredibly convenient to prepare, making them a perfect project for families looking to bond over holiday baking. Whether you’re hosting a festive party or simply indulging in a sweet treat, Christmas Chocolate Trees are sure to bring smiles and create lasting memories.

Ingredients:
- 200g dark chocolate (at least 70% cocoa)
- 100g white chocolate
- 1 cup of crushed peppermint candies or candy canes
- 1 cup of assorted sprinkles (red, green, and gold)
- 1 cup of mini marshmallows
- 1 cup of edible glitter (optional)
- 1 tablespoon of coconut oil (for melting chocolate)
- Parchment paper (for lining baking sheets)
- Tree-shaped cookie cutters (various sizes)
Preparing the Chocolate
- Start by breaking the dark chocolate into small pieces and placing them in a heatproof bowl. This will help it melt evenly.
- Add the tablespoon of coconut oil to the bowl. The coconut oil will give the chocolate a nice sheen and help it to set properly.
- Set up a double boiler by filling a saucepan with a couple of inches of water and bringing it to a simmer. Place the bowl with the dark chocolate over the saucepan, ensuring that the bottom of the bowl does not touch the water.
- Stir the chocolate occasionally as it melts. Once it is completely melted and smooth, remove it from the heat and let it cool slightly.
- In a separate bowl, repeat the process with the white chocolate. Break it into pieces, add a little coconut oil, and melt it using the same double boiler method. Stir until smooth and set aside.
Creating the Chocolate Trees
- Line a baking sheet with parchment paper. This will prevent the chocolate from sticking and make cleanup easier.
- Using the tree-shaped cookie cutters, place them on the parchment paper. You can use different sizes to create a variety of tree shapes.
- Once the dark chocolate has cooled slightly but is still pourable, carefully spoon it into the cookie cutters, filling them about halfway. Use a spatula to smooth the top and ensure an even layer.
- Before the dark chocolate sets, sprinkle a layer of crushed peppermint candies over the top. This will add a festive crunch and flavor to your trees.
- Next, take the melted white chocolate and drizzle it over the dark chocolate trees. You can use a spoon or a piping bag for more control. This will create a beautiful contrast and mimic the look of snow on the trees.
- While the white chocolate is still wet, add your assorted sprinkles and mini marshmallows to the trees. Be creative! You can make some trees look like they are covered in ornaments and others with fluffy snow.
- For an extra touch of sparkle, sprinkle edible glitter over the trees before the chocolate sets.
Setting the Chocolate Trees
- Once you have decorated all your chocolate trees, place the baking sheet in the refrigerator. Allow the chocolate to set for at least 30 minutes. This will ensure that the trees hold their shape when you remove them from the cookie cutters.
- After the chocolate has set, carefully remove the cookie cutters from around the trees. If the chocolate is stubborn, you can gently wiggle the cutter or use a small knife to help release it.
- Place the finished chocolate trees on a serving platter or individual treat bags for gifting. They can be stored in an airtight container in the refrigerator for up to two weeks.
Serving Suggestions
- These Christmas chocolate trees make a delightful centerpiece for your holiday table. Arrange them on a festive platter surrounded by additional candy canes or holiday-themed treats.
- For a fun activity, let your guests decorate their own chocolate trees. Set up a decorating station with extra sprinkles, candies, and melted chocolate for drizzling.
- Pair these chocolate trees with a warm cup of hot cocoa or a festive holiday drink for a cozy treat.
Tips for Success
- Make sure to use high-quality chocolate for the best flavor and texture. The cocoa percentage in dark chocolate can affect the sweetness, so choose according to your preference.
- Be patient while melting the chocolate. Stirring frequently will help prevent it from burning.
- If you want to add more
Conclusion:
In conclusion, these Christmas Chocolate Trees are not just a delightful treat; they are a festive centerpiece that brings joy and creativity to your holiday celebrations. The combination of rich chocolate, colorful decorations, and the fun of assembling your own edible trees makes this recipe a must-try for anyone looking to add a touch of magic to their Christmas festivities. Whether you’re hosting a holiday party, looking for a fun activity with the kids, or simply want to indulge in a sweet treat, these chocolate trees are sure to impress.
For serving suggestions, consider placing your chocolate trees on a decorative platter surrounded by edible glitter or shredded coconut to mimic snow. You can also pair them with a warm cup of hot cocoa or a scoop of vanilla ice cream for a delightful dessert experience. If you want to get creative, try using different types of chocolate, such as white chocolate or dark chocolate, to create a variety of trees. You can also experiment with different toppings like crushed candy canes, sprinkles, or even edible gold leaf for an extra touch of elegance.
I encourage you to gather your family and friends, roll up your sleeves, and dive into the fun of making these Christmas Chocolate Trees. Not only will you enjoy the delicious results, but you’ll also create lasting memories in the process. Once you’ve made your own chocolate trees, I would love to hear about your experience! Share your photos and stories on social media, and don’t forget to tag us so we can see your beautiful creations. Your unique twists and variations can inspire others to try this festive recipe, spreading the joy of Christmas even further.
So, what are you waiting for? Grab your ingredients, unleash your creativity, and make this holiday season a little sweeter with these charming Christmas Chocolate Trees. Happy baking, and may your holidays be filled with love, laughter, and lots of chocolate!
Christmas Chocolate Trees: Delightful Treats for the Holiday Season
Create festive Chocolate Christmas Trees with rich dark and creamy white chocolate, topped with crushed peppermint, sprinkles, and mini marshmallows. These delightful treats make a perfect holiday centerpiece or gift, bringing joy to your celebrations!
Ingredients
- 200g dark chocolate (at least 70% cocoa)
- 100g white chocolate
- 1 cup of crushed peppermint candies or candy canes
- 1 cup of assorted sprinkles (red, green, and gold)
- 1 cup of mini marshmallows
- 1 cup of edible glitter (optional)
- 1 tablespoon of coconut oil (for melting chocolate)
- Parchment paper (for lining baking sheets)
- Tree-shaped cookie cutters (various sizes)
Instructions
- Break the dark chocolate into small pieces and place them in a heatproof bowl.
- Add the tablespoon of coconut oil to the bowl.
- Set up a double boiler by filling a saucepan with a couple of inches of water and bringing it to a simmer. Place the bowl with the dark chocolate over the saucepan, ensuring that the bottom of the bowl does not touch the water.
- Stir the chocolate occasionally as it melts. Once it is completely melted and smooth, remove it from the heat and let it cool slightly.
- In a separate bowl, repeat the process with the white chocolate. Break it into pieces, add a little coconut oil, and melt it using the same double boiler method. Stir until smooth and set aside.
- Line a baking sheet with parchment paper.
- Using the tree-shaped cookie cutters, place them on the parchment paper.
- Once the dark chocolate has cooled slightly but is still pourable, carefully spoon it into the cookie cutters, filling them about halfway. Use a spatula to smooth the top.
- Before the dark chocolate sets, sprinkle a layer of crushed peppermint candies over the top.
- Drizzle the melted white chocolate over the dark chocolate trees using a spoon or piping bag.
- While the white chocolate is still wet, add your assorted sprinkles and mini marshmallows to the trees.
- For an extra touch of sparkle, sprinkle edible glitter over the trees before the chocolate sets.
- Place the baking sheet in the refrigerator and allow the chocolate to set for at least 30 minutes.
- Carefully remove the cookie cutters from around the trees. If needed, gently wiggle the cutter or use a small knife to help release it.
- Place the finished chocolate trees on a serving platter or individual treat bags for gifting. Store in an airtight container in the refrigerator for up to two weeks.
Notes
- Use high-quality chocolate for the best flavor and texture.
- Stir frequently while melting the chocolate to prevent burning.
- Customize your decorations with additional candies or toppings as desired.


Leave a Comment