
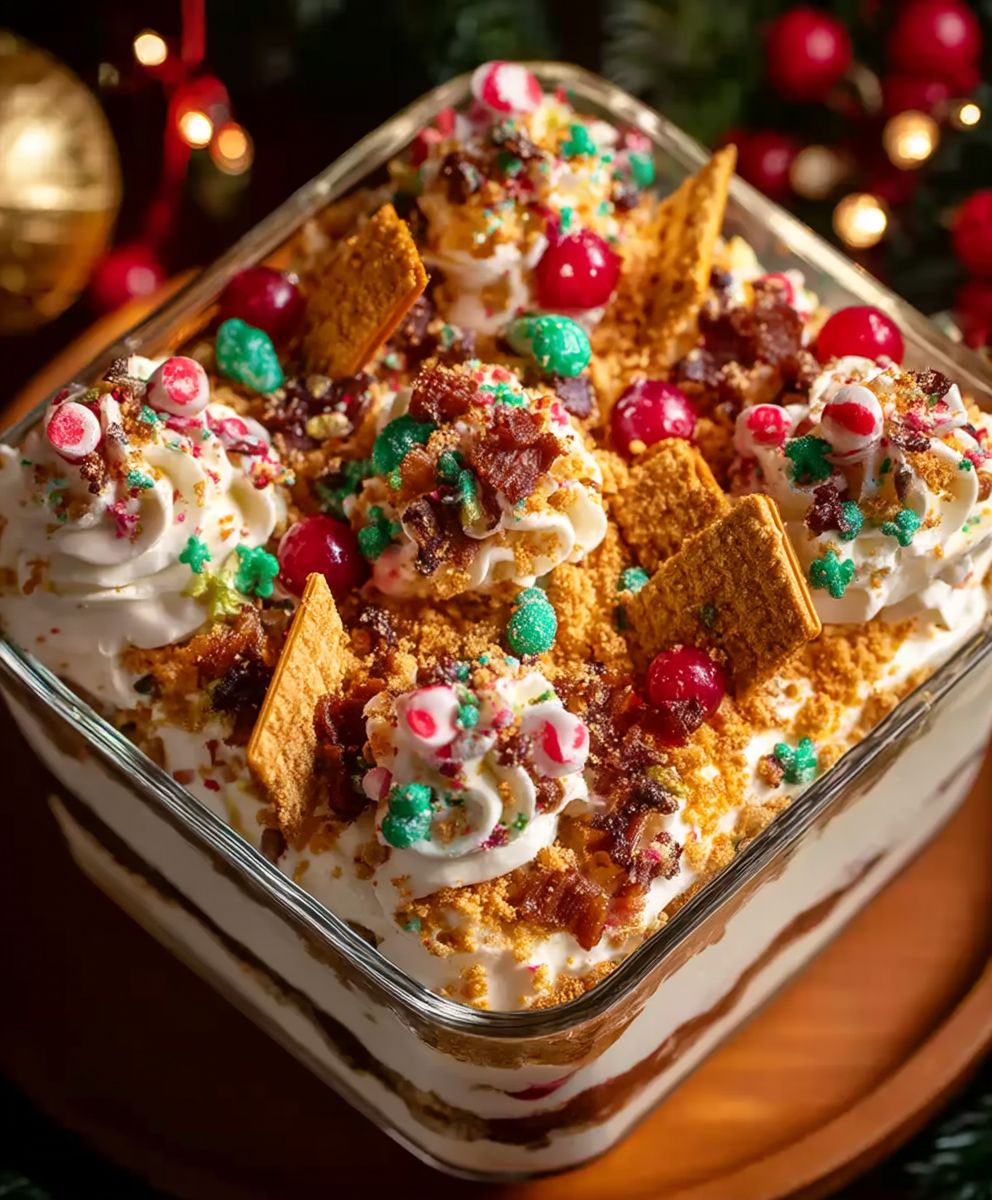
Christmas Magic Layers: A Festive Delight
Christmas Magic Layers is a delightful dessert that captures the essence of the holiday season in every bite. This enchanting treat combines rich flavors and vibrant colors, making it a showstopper at any festive gathering. As I prepare this recipe, I can’t help but reminisce about the joy it brings to family gatherings, where each layer tells a story of tradition and celebration.
The history of layered desserts dates back centuries, with various cultures creating their own versions to celebrate special occasions. However, Christmas Magic Layers holds a special place in my heart, as it has become a beloved staple in my family’s holiday traditions. People adore this dish not only for its stunning appearance but also for its delightful combination of creamy textures and sweet flavors that dance on the palate.
What makes Christmas Magic Layers truly special is its convenience; it can be prepared ahead of time, allowing you to enjoy the festivities without the stress of last-minute baking. Whether you’re hosting a holiday party or simply indulging in a cozy night in, this dessert is sure to spread joy and warmth. Join me in creating this magical treat that will surely become a cherished part of your holiday celebrations!

Ingredients:
- For the Cake Layers:
- 2 cups all-purpose flour
- 1 ½ cups granulated sugar
- ½ cup unsweetened cocoa powder
- 1 ½ teaspoons baking powder
- 1 ½ teaspoons baking soda
- 1 teaspoon salt
- 2 large eggs
- 1 cup whole milk
- ½ cup vegetable oil
- 2 teaspoons vanilla extract
- 1 cup boiling water
- For the Cream Cheese Frosting:
- 1 cup unsalted butter, softened
- 8 oz cream cheese, softened
- 4 cups powdered sugar
- 2 teaspoons vanilla extract
- 1-2 tablespoons milk (as needed for consistency)
- For the Decoration:
- Red and green sprinkles
- Fresh mint leaves (optional)
- Chocolate shavings (optional)
Preparing the Cake Layers
- Preheat your oven to 350°F (175°C). Grease and flour two 9-inch round cake pans.
- In a large mixing bowl, combine the flour, sugar, cocoa powder, baking powder, baking soda, and salt. Whisk these dry ingredients together until they are well mixed.
- Add the eggs, milk, vegetable oil, and vanilla extract to the dry ingredients. Using an electric mixer, beat on medium speed for about 2 minutes until the batter is smooth.
- Carefully stir in the boiling water. The batter will be thin, but that’s perfectly fine!
- Pour the batter evenly into the prepared cake pans.
- Bake in the preheated oven for 30-35 minutes, or until a toothpick inserted into the center comes out clean.
- Once baked, remove the cakes from the oven and let them cool in the pans for about 10 minutes. Then, transfer them to a wire rack to cool completely.
Making the Cream Cheese Frosting
- In a large mixing bowl, beat the softened butter with an electric mixer until creamy and smooth.
- Add the softened cream cheese and continue to beat until well combined and fluffy.
- Gradually add the powdered sugar, one cup at a time, mixing on low speed until incorporated. Once all the sugar is added, increase the speed to medium and beat until the frosting is light and fluffy.
- Mix in the vanilla extract. If the frosting is too thick, add milk one tablespoon at a time until you reach your desired consistency.
Assembling the Cake
- Once the cake layers are completely cooled, place one layer on a serving plate or cake stand.
- Spread a generous amount of cream cheese frosting on top of the first layer, smoothing it out with a spatula.
- Carefully place the second cake layer on top of the frosted layer.
- Use the remaining cream cheese frosting to frost the top and sides of the entire cake. Make sure to cover it evenly for a beautiful finish.
Decorating the Cake
- Once the cake is frosted, it’s time to add some festive decorations! Start by sprinkling red and green sprinkles over the top and sides of the cake.
- If you want to add a touch of elegance, you can also add chocolate shavings on top.
- For a fresh touch, place a few mint leaves around the top of the cake.
- Feel free to get creative with your decorations! You can even add edible glitter for a magical touch.
Serving the Cake
- Once decorated, slice the cake into generous pieces. I recommend using a sharp knife dipped in hot water for clean cuts.
- Serve the cake
Conclusion:
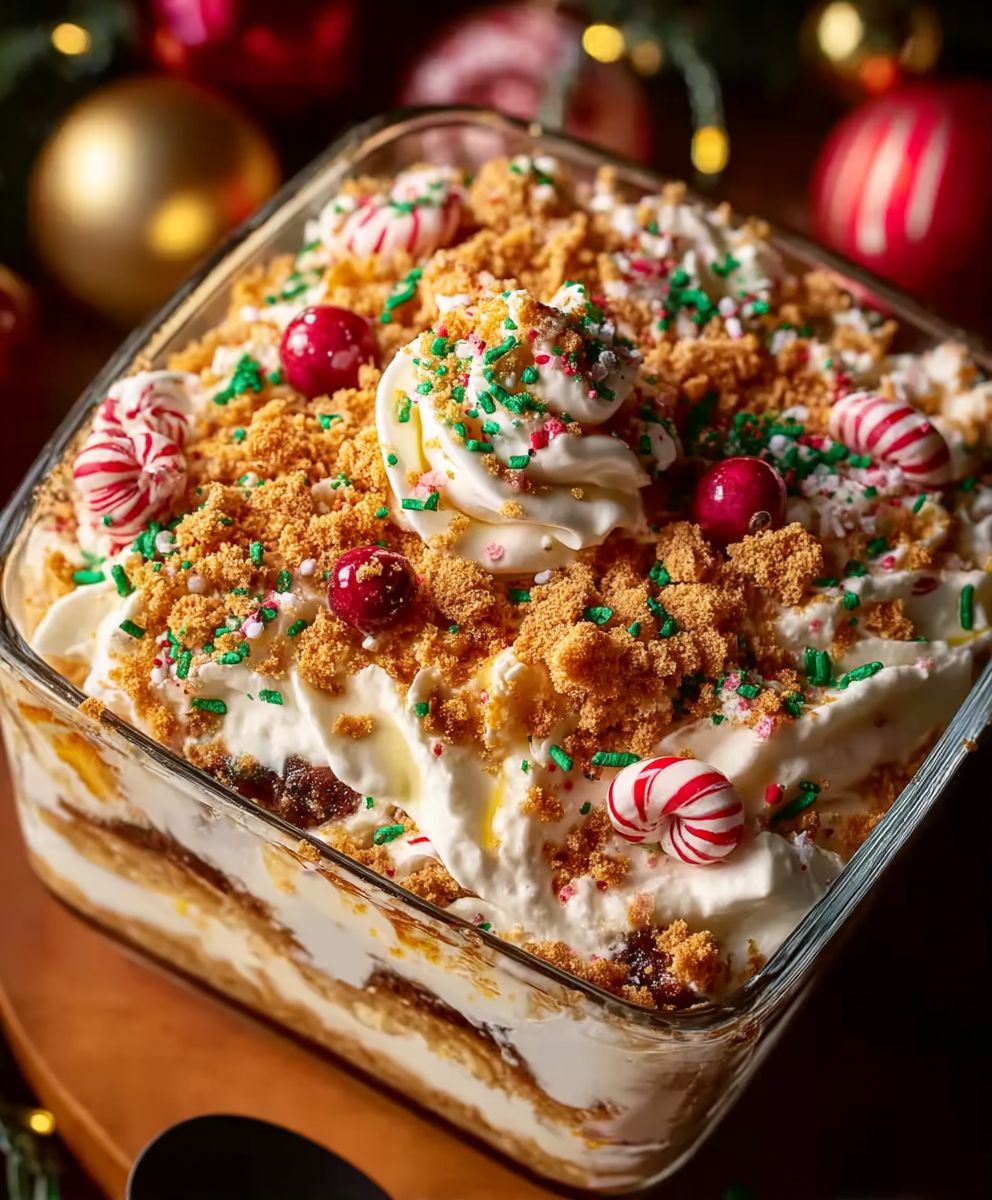
If you’re looking for a festive treat that captures the essence of the holiday season, then this Christmas Magic Layers recipe is an absolute must-try! The combination of rich flavors, vibrant colors, and delightful textures makes it a standout dessert that will impress your family and friends. Each layer brings something unique to the table, from the creamy filling to the crunchy topping, creating a symphony of taste that is sure to evoke the spirit of Christmas in every bite.
When it comes to serving suggestions, the possibilities are endless! You can present your Christmas Magic Layers in individual cups for a charming touch, or serve it in a large dish for a more communal experience. Consider garnishing with fresh berries, a sprinkle of powdered sugar, or even a drizzle of chocolate sauce to elevate the presentation. For those who love a bit of spice, adding a dash of cinnamon or nutmeg can enhance the holiday flavor profile even further.
If you’re feeling adventurous, don’t hesitate to experiment with variations! You could swap out the traditional flavors for something more unique, like peppermint or gingerbread, to give your Christmas Magic Layers a personal twist. Alternatively, try incorporating seasonal fruits like pomegranate or cranberries for a refreshing burst of flavor that complements the richness of the layers.
I wholeheartedly encourage you to give this recipe a try! It’s not just about the delicious outcome; it’s also about the joy of creating something special during the holiday season. Gather your loved ones, roll up your sleeves, and enjoy the process of making this delightful dessert together. Once you’ve made your Christmas Magic Layers, I would love to hear about your experience! Share your thoughts, any variations you tried, or even a photo of your creation on social media. Let’s spread the holiday cheer and inspire others to join in on the fun!
In conclusion, the Christmas Magic Layers recipe is not only a treat for the taste buds but also a wonderful way to create lasting memories with those you cherish. So, what are you waiting for? Dive into this festive adventure and make your holiday celebrations even more magical!
Christmas Magic Layers: Unveiling the Secrets to a Festive Celebration
Indulge in a rich and moist chocolate cake layered with creamy cream cheese frosting, perfect for any celebration. Decorated with festive sprinkles, optional chocolate shavings, and fresh mint leaves, this elegant dessert is sure to impress and satisfy your sweet tooth.
Ingredients
- 2 cups all-purpose flour
- 1 ½ cups granulated sugar
- ½ cup unsweetened cocoa powder
- 1 ½ teaspoons baking powder
- 1 ½ teaspoons baking soda
- 1 teaspoon salt
- 2 large eggs
- 1 cup whole milk
- ½ cup vegetable oil
- 2 teaspoons vanilla extract
- 1 cup boiling water
- 1 cup unsalted butter, softened
- 8 oz cream cheese, softened
- 4 cups powdered sugar
- 2 teaspoons vanilla extract
- 1-2 tablespoons milk (as needed for consistency)
- Red and green sprinkles
- Fresh mint leaves (optional)
- Chocolate shavings (optional)
Instructions
- Preheat your oven to 350°F (175°C). Grease and flour two 9-inch round cake pans.
- In a large mixing bowl, combine the flour, sugar, cocoa powder, baking powder, baking soda, and salt. Whisk these dry ingredients together until well mixed.
- Add the eggs, milk, vegetable oil, and vanilla extract to the dry ingredients. Using an electric mixer, beat on medium speed for about 2 minutes until the batter is smooth.
- Carefully stir in the boiling water. The batter will be thin, but that’s perfectly fine!
- Pour the batter evenly into the prepared cake pans.
- Bake in the preheated oven for 30-35 minutes, or until a toothpick inserted into the center comes out clean.
- Once baked, remove the cakes from the oven and let them cool in the pans for about 10 minutes. Then, transfer them to a wire rack to cool completely.
- In a large mixing bowl, beat the softened butter with an electric mixer until creamy and smooth.
- Add the softened cream cheese and continue to beat until well combined and fluffy.
- Gradually add the powdered sugar, one cup at a time, mixing on low speed until incorporated. Once all the sugar is added, increase the speed to medium and beat until the frosting is light and fluffy.
- Mix in the vanilla extract. If the frosting is too thick, add milk one tablespoon at a time until you reach your desired consistency.
- Once the cake layers are completely cooled, place one layer on a serving plate or cake stand.
- Spread a generous amount of cream cheese frosting on top of the first layer, smoothing it out with a spatula.
- Carefully place the second cake layer on top of the frosted layer.
- Use the remaining cream cheese frosting to frost the top and sides of the entire cake. Make sure to cover it evenly for a beautiful finish.
- Once the cake is frosted, it’s time to add some festive decorations! Start by sprinkling red and green sprinkles over the top and sides of the cake.
- If you want to add a touch of elegance, you can also add chocolate shavings on top.
- For a fresh touch, place a few mint leaves around the top of the cake.
- Feel free to get creative with your decorations! You can even add edible glitter for a magical touch.
- Once decorated, slice the cake into generous pieces. I recommend using a sharp knife dipped in hot water for clean cuts.
- Serve the cake and enjoy!
Notes
- Ensure all ingredients are at room temperature for the best results.
- The cake can be made a day in advance and stored in an airtight container.
- Feel free to customize the decorations based on the occasion.

Leave a Comment