
Grilled Cheese Roll Ups: A Fun Twist on a Classic Favorite
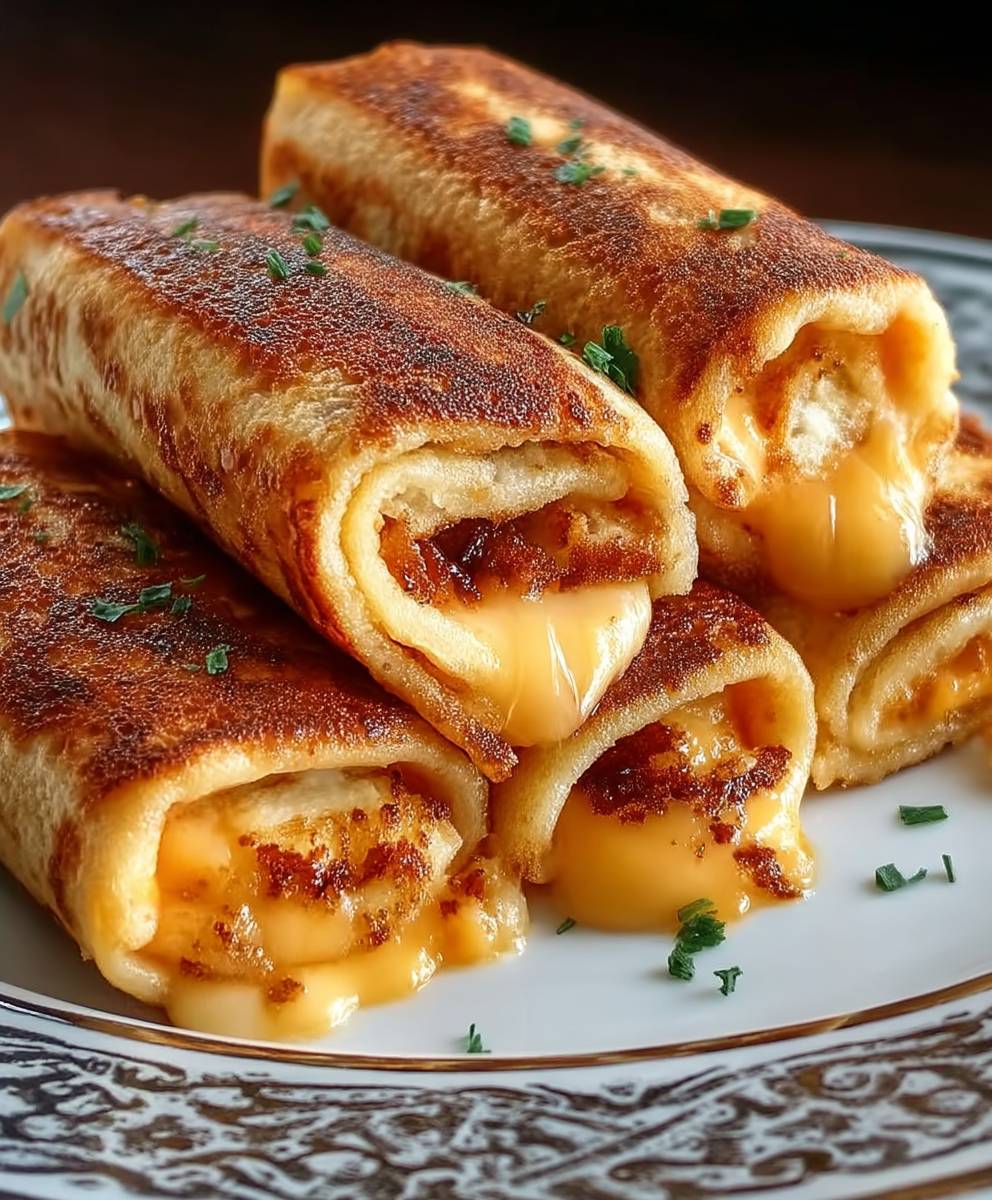
Grilled Cheese Roll Ups are a delightful and innovative take on the beloved classic grilled cheese sandwich. Imagine the gooey, melty cheese you adore, but wrapped in a fun, bite-sized roll that’s perfect for dipping! This recipe not only brings a playful twist to a traditional favorite but also makes it an ideal snack or meal for both kids and adults alike.
The history of grilled cheese sandwiches dates back to the 1920s, when they became a popular comfort food in America. Over the years, variations have emerged, but the essence of a warm, cheesy delight remains unchanged. Grilled Cheese Roll Ups take this nostalgia and elevate it, making it a convenient option for busy families or a fun appetizer for gatherings.
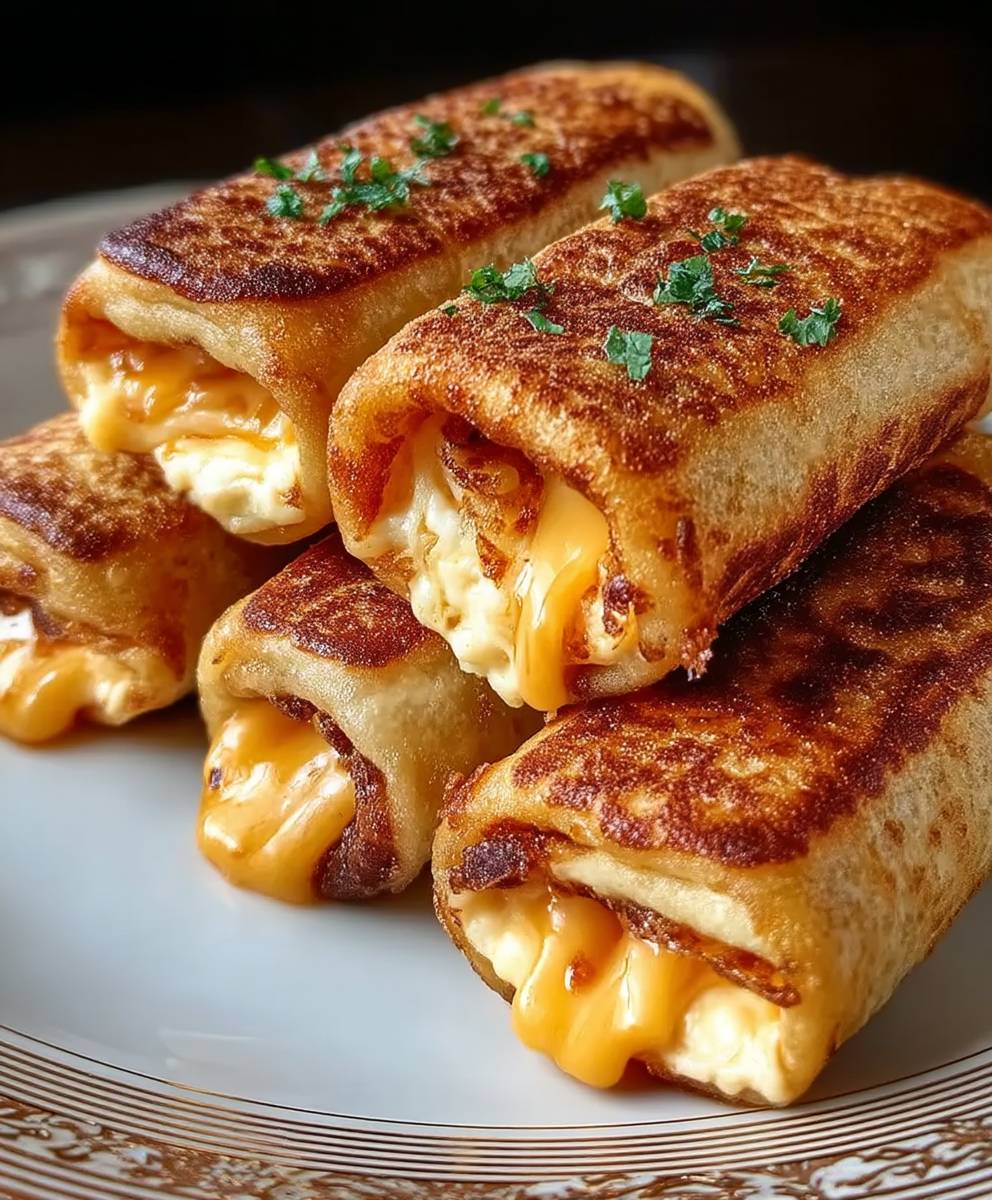
People love Grilled Cheese Roll Ups for their irresistible taste and texture. The crispy exterior combined with the warm, melted cheese creates a satisfying crunch that is hard to resist. Plus, they are incredibly easy to make, allowing you to whip up a batch in no time. Whether you’re serving them at a party or enjoying them as a quick lunch, Grilled Cheese Roll Ups are sure to become a new favorite in your household!

Ingredients:
- 8 slices of bread (white or whole wheat)
- 8 slices of cheese (cheddar, American, or your favorite)
- 4 tablespoons of butter, softened
- 1 teaspoon of garlic powder (optional)
- 1 teaspoon of dried parsley (optional)
- Salt and pepper to taste
Preparing the Roll Ups
- Start by laying out the slices of bread on a clean surface. You can use a cutting board or a large plate.
- Using a rolling pin, gently flatten each slice of bread. This will help the bread roll up more easily and create a nice texture.
- Once flattened, place a slice of cheese on each piece of bread. Make sure to center the cheese so that it doesn’t spill out when you roll it up.
- Carefully roll each slice of bread tightly around the cheese. Start from one end and roll towards the other, ensuring the cheese is fully enclosed. You can use your fingers to pinch the ends to keep the cheese from escaping.
Preparing the Butter Mixture
- In a small bowl, combine the softened butter, garlic powder, dried parsley, salt, and pepper. Mix well until all ingredients are fully incorporated.
- Spread a thin layer of the butter mixture on the outside of each rolled-up sandwich. This will give the roll-ups a delicious golden-brown crust when grilled.
Cooking Process
- Heat a large skillet or frying pan over medium heat. You want it hot enough to grill the roll-ups but not so hot that the butter burns.
- Once the skillet is hot, place the roll-ups seam side down in the pan. Make sure not to overcrowd the pan; you may need to do this in batches depending on the size of your skillet.
- Cook the roll-ups for about 2-3 minutes on one side, or until they are golden brown and crispy. Use a spatula to gently lift one to check the color.
- Once the first side is golden, carefully flip each roll-up over to cook the other side. Cook for another 2-3 minutes until it is also golden brown and the cheese is melted inside.
- If you find that the roll-ups are browning too quickly, you can lower the heat slightly to ensure the cheese has time to melt without burning the bread.
Assembling and Serving
- Once all the roll-ups are cooked, remove them from the skillet and place them on a paper towel-lined plate to absorb any excess butter.
- Let them cool for a minute or two before slicing them into bite-sized pieces. This will make them easier to eat and allow the cheese to set slightly.
- Arrange the sliced roll-ups on a serving platter. You can serve them with a side of marinara sauce, ranch dressing, or your favorite dipping sauce for an extra flavor boost.
- Enjoy your delicious grilled cheese roll-ups while they are warm! They make a perfect snack, appetizer, or even a fun lunch option.
Tips for Perfect Grilled Cheese Roll Ups
- Cheese Choices: Feel free to experiment with different types of cheese. Mozzarella, pepper jack, or a blend of cheeses can add unique flavors.
- Herbs and Spices: You can customize the butter mixture with your favorite herbs and spices. Try adding Italian seasoning, chili powder, or even a pinch of cayenne for a kick.
- Make Ahead: You can prepare the roll-ups ahead of time and store them in the refrigerator. Just grill them when you’re ready to serve.
- Oven Option: If you prefer, you can bake the roll-ups in the oven. Preheat your oven to 375°F (190°C), place the roll-ups on a baking sheet, and bake for about 10-12 minutes, flipping halfway through.
Variations to Try
- Veggie Roll Ups: Add thin slices of vegetables like bell peppers, spinach,
Conclusion:
In conclusion, these Grilled Cheese Roll Ups are an absolute must-try for anyone looking to elevate their snacking game. Not only are they incredibly easy to make, but they also offer a delightful twist on the classic grilled cheese sandwich that will have both kids and adults coming back for more. The crispy exterior combined with the gooey, melted cheese inside creates a satisfying texture that is simply irresistible. Plus, they can be whipped up in no time, making them perfect for a quick lunch, an after-school snack, or even a fun appetizer for your next gathering.
If you’re looking to add a little variety to your Grilled Cheese Roll Ups, consider experimenting with different types of cheese. Cheddar is a classic choice, but you could also try mozzarella for a stretchy, melty experience, or even pepper jack for a spicy kick. For those who enjoy a bit of sweetness, adding a slice of tomato or a sprinkle of herbs can elevate the flavor profile even further. You could also serve them with a side of marinara sauce for dipping, which adds a delicious Italian flair to the dish. Alternatively, try pairing them with a fresh salad or a bowl of tomato soup for a comforting meal that’s sure to please.
I encourage you to give this recipe a try and see how it fits into your culinary repertoire. Whether you’re making them for a family movie night, a casual get-together with friends, or just for yourself, these Grilled Cheese Roll Ups are bound to impress. Don’t forget to share your experience with me! I would love to hear how your roll ups turned out and any creative variations you came up with. You can share your thoughts in the comments below or tag me on social media. Let’s spread the love for these delicious snacks together!
So, gather your ingredients, roll up your sleeves, and get ready to enjoy a delightful treat that’s both nostalgic and innovative. Trust me, once you try these Grilled Cheese Roll Ups, they will become a staple in your kitchen. Happy cooking!
Grilled Cheese Roll Ups: A Delicious Twist on a Classic Favorite
These Grilled Cheese Roll-Ups are a creative take on the classic sandwich, featuring crispy exteriors and gooey cheese interiors. Ideal for snacks, appetizers, or lunch, they can be paired with your favorite dipping sauce for added flavor.
Ingredients
- 8 slices of bread (white or whole wheat)
- 8 slices of cheese (cheddar, American, or your favorite)
- 4 tablespoons of butter, softened
- 1 teaspoon of garlic powder (optional)
- 1 teaspoon of dried parsley (optional)
- Salt and pepper to taste
Instructions
- Lay out the slices of bread on a clean surface.
- Using a rolling pin, gently flatten each slice of bread.
- Place a slice of cheese on each piece of bread, centering it.
- Carefully roll each slice of bread tightly around the cheese, pinching the ends to keep the cheese from escaping.
- In a small bowl, combine the softened butter, garlic powder, dried parsley, salt, and pepper. Mix well.
- Spread a thin layer of the butter mixture on the outside of each rolled-up sandwich.
- Heat a large skillet or frying pan over medium heat.
- Place the roll-ups seam side down in the pan, ensuring not to overcrowd.
- Cook for about 2-3 minutes on one side until golden brown and crispy.
- Flip each roll-up and cook for another 2-3 minutes until golden brown and the cheese is melted.
- Adjust the heat if necessary to prevent burning.
- Remove the cooked roll-ups from the skillet and place them on a paper towel-lined plate.
- Let them cool for a minute before slicing into bite-sized pieces.
- Arrange on a serving platter and serve with marinara sauce, ranch dressing, or your favorite dipping sauce.
Notes
- Feel free to experiment with different types of cheese and customize the butter mixture with your favorite herbs and spices.
- You can prepare the roll-ups ahead of time and store them in the refrigerator, grilling them when ready to serve.
- For a baked version, preheat your oven to 375°F (190°C), place the roll-ups on a baking sheet, and bake for about 10-12 minutes, flipping halfway through.


Leave a Comment