
No-Bake Cheesecake Pops
No-Bake Cheesecake Pops are the perfect treat for anyone who loves the creamy, rich flavor of cheesecake but wants a fun and convenient way to enjoy it. These delightful bites are not only easy to make, but they also bring a sense of nostalgia, reminding many of summer picnics and family gatherings. Originating from the classic cheesecake, these pops have evolved into a trendy dessert that captures the hearts of both kids and adults alike.
People adore No-Bake Cheesecake Pops for their luscious texture and the ability to customize them with various toppings, from fresh fruit to chocolate drizzle. The convenience of making them without an oven makes them a go-to recipe for warm days or last-minute gatherings. Plus, they are a fantastic way to impress guests with minimal effort! Whether you’re hosting a party or simply indulging in a sweet treat at home, No-Bake Cheesecake Pops are sure to satisfy your cravings and leave everyone wanting more.

Ingredients:
- 1 ½ cups graham cracker crumbs
- ½ cup unsalted butter, melted
- 2 cups cream cheese, softened
- 1 cup powdered sugar
- 1 teaspoon vanilla extract
- 1 cup heavy whipping cream
- ½ cup chocolate chips (optional)
- Sprinkles or crushed nuts for decoration (optional)
- Popsicle sticks or lollipop sticks
Preparing the Crust
- In a medium mixing bowl, combine the graham cracker crumbs and melted butter. Stir until the mixture resembles wet sand.
- Press the mixture firmly into the bottom of a 9×9 inch baking dish or a similar-sized container. Use the back of a measuring cup or your fingers to ensure it’s packed tightly and evenly.
- Place the crust in the refrigerator to set while you prepare the cheesecake filling. This will help it firm up and hold its shape better.
Making the Cheesecake Filling
- In a large mixing bowl, beat the softened cream cheese with an electric mixer on medium speed until smooth and creamy, about 2-3 minutes.
- Add the powdered sugar and vanilla extract to the cream cheese. Continue to beat until fully combined and there are no lumps, about 1-2 minutes.
- In a separate bowl, whip the heavy cream until stiff peaks form. This usually takes about 3-5 minutes with an electric mixer on high speed.
- Gently fold the whipped cream into the cream cheese mixture using a spatula. Be careful not to deflate the whipped cream; you want to keep the mixture light and airy.
Assembling the Cheesecake Pops
- Once the cheesecake filling is ready, remove the crust from the refrigerator. Spoon the cheesecake mixture over the crust, spreading it evenly with a spatula.
- Cover the dish with plastic wrap and place it back in the refrigerator for at least 4 hours, or until the cheesecake is firm enough to cut into pops.
- After the cheesecake has set, remove it from the refrigerator. Use a sharp knife to cut the cheesecake into squares or rectangles, depending on your preference for pop size.
- Insert a popsicle stick into the center of each cheesecake square. Make sure the stick goes in deep enough to hold the pop together but not so deep that it comes out the bottom.
Coating the Cheesecake Pops (Optional)
- If you want to add a chocolate coating, melt the chocolate chips in a microwave-safe bowl. Heat in 30-second intervals, stirring in between, until fully melted and smooth.
- Dip each cheesecake pop into the melted chocolate, ensuring it’s fully coated. Allow any excess chocolate to drip off.
- Before the chocolate sets, sprinkle the tops with your choice of sprinkles or crushed nuts for added texture and decoration.
- Place the coated pops back on a parchment-lined baking sheet and return them to the refrigerator for about 30 minutes to allow the chocolate to harden.
Serving the Cheesecake Pops
- Once the chocolate has set, your no-bake cheesecake pops are ready to serve! You can keep them in the refrigerator until you’re ready to enjoy them.
- To serve, simply remove the pops from the baking sheet and arrange them on a platter. They make a delightful treat for parties, gatherings, or just a sweet snack at home.
- These pops can be stored in an airtight container in the refrigerator for up to a week, but I doubt they’ll last that long!
Tips for Success
- Make sure your cream cheese is at room temperature for easier mixing and a smoother filling.
- Feel free to customize the flavor of your cheesecake by adding lemon zest, chocolate, or fruit puree to the filling.
- If you prefer a lighter crust, you can substitute half of the graham cracker crumbs with crushed nuts or oats.
- For a fun twist, try using different types of chocolate for coating,
Conclusion:
If you’re looking for a delightful dessert that’s both easy to make and incredibly satisfying, then these No-Bake Cheesecake Pops are an absolute must-try! With their creamy texture and rich flavor, they offer a perfect balance of sweetness that will leave your taste buds dancing. The best part? You don’t even need to turn on the oven! This recipe is not only simple but also allows for endless creativity, making it a fantastic choice for any occasion.
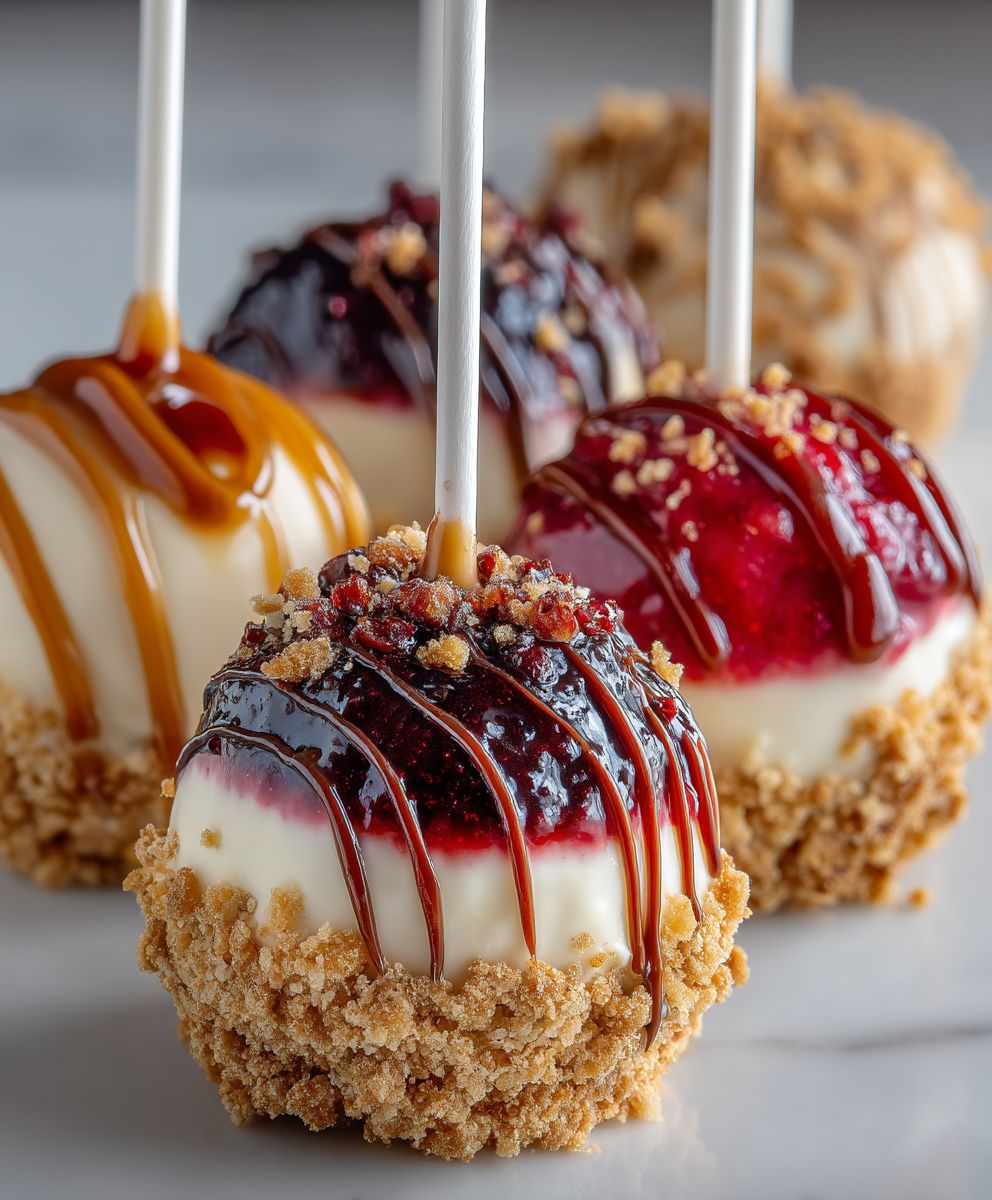
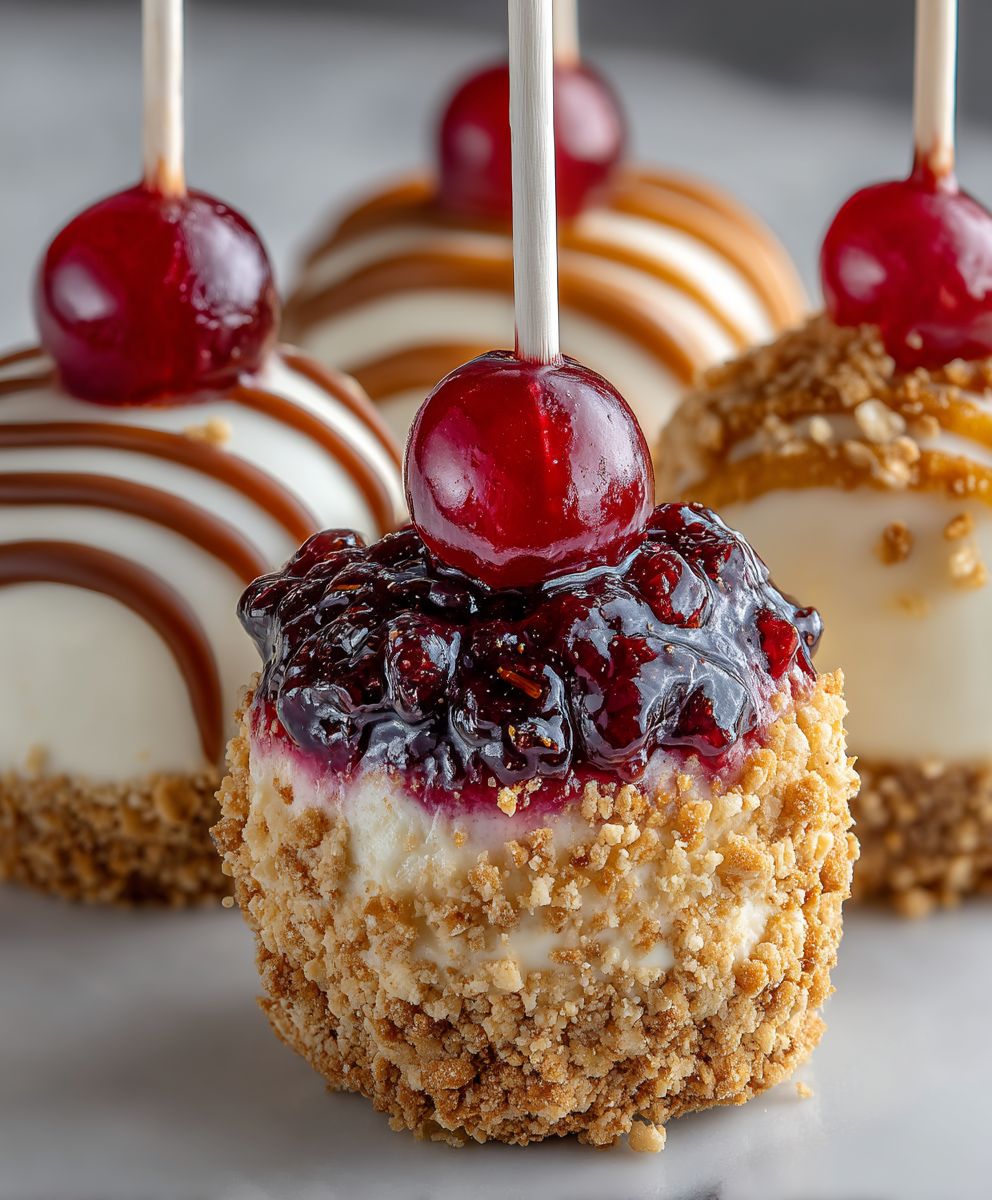
When it comes to serving suggestions, these cheesecake pops are incredibly versatile. You can serve them on a hot summer day as a refreshing treat, or present them at a party as a fun and unique dessert option. Consider dipping them in chocolate and rolling them in crushed nuts or sprinkles for an extra touch of flair. You could also drizzle some caramel or chocolate sauce over the top before serving to elevate their presentation and flavor. For a fruity twist, try adding a layer of fruit puree or fresh berries between the cheesecake layers. The possibilities are truly endless!
I encourage you to gather your ingredients and give this No-Bake Cheesecake Pops recipe a try. It’s a fantastic way to impress your friends and family, and I promise they will be asking for seconds! Plus, making these pops is a fun activity that you can enjoy with kids or friends, turning the kitchen into a creative space filled with laughter and deliciousness.
Once you’ve made your cheesecake pops, I would love to hear about your experience! Did you try any unique variations? How did your friends and family react? Sharing your journey not only inspires others to try this recipe but also creates a community of dessert lovers who can exchange tips and ideas. So, don’t forget to snap a picture of your beautiful creations and share them on social media, tagging your favorite food bloggers or using the hashtag #NoBakeCheesecakePops.
In conclusion, these No-Bake Cheesecake Pops are not just a dessert; they are an experience waiting to happen. With their delightful taste, easy preparation, and endless customization options, they are sure to become a staple in your dessert repertoire. So go ahead, indulge in this sweet treat, and let your creativity shine!
No-Bake Cheesecake Pops: Easy and Delicious Dessert Recipe
Enjoy these No-Bake Cheesecake Pops, featuring a creamy cheesecake filling on a buttery graham cracker crust. Perfect for any occasion, these customizable treats can be coated in chocolate and topped with fun decorations for a delightful dessert experience!
Ingredients
- 1 ½ cups graham cracker crumbs
- ½ cup unsalted butter, melted
- 2 cups cream cheese, softened
- 1 cup powdered sugar
- 1 teaspoon vanilla extract
- 1 cup heavy whipping cream
- ½ cup chocolate chips (optional)
- Sprinkles or crushed nuts for decoration (optional)
- Popsicle sticks or lollipop sticks
Instructions
- In a medium mixing bowl, combine the graham cracker crumbs and melted butter. Stir until the mixture resembles wet sand.
- Press the mixture firmly into the bottom of a 9×9 inch baking dish or a similar-sized container. Use the back of a measuring cup or your fingers to ensure it’s packed tightly and evenly.
- Place the crust in the refrigerator to set while you prepare the cheesecake filling.
- In a large mixing bowl, beat the softened cream cheese with an electric mixer on medium speed until smooth and creamy, about 2-3 minutes.
- Add the powdered sugar and vanilla extract to the cream cheese. Continue to beat until fully combined and there are no lumps, about 1-2 minutes.
- In a separate bowl, whip the heavy cream until stiff peaks form, about 3-5 minutes with an electric mixer on high speed.
- Gently fold the whipped cream into the cream cheese mixture using a spatula.
- Remove the crust from the refrigerator and spoon the cheesecake mixture over the crust, spreading it evenly.
- Cover the dish with plastic wrap and refrigerate for at least 4 hours, or until firm.
- Once set, cut the cheesecake into squares or rectangles.
- Insert a popsicle stick into the center of each cheesecake square.
- Melt the chocolate chips in a microwave-safe bowl, heating in 30-second intervals until smooth.
- Dip each cheesecake pop into the melted chocolate, allowing excess to drip off.
- Sprinkle with your choice of sprinkles or crushed nuts before the chocolate sets.
- Place the coated pops on a parchment-lined baking sheet and refrigerate for about 30 minutes to harden.
- Once the chocolate has set, remove the pops from the baking sheet and arrange them on a platter.
- Store in an airtight container in the refrigerator for up to a week.
Notes
- Ensure cream cheese is at room temperature for easier mixing.
- Customize flavors by adding lemon zest, chocolate, or fruit puree.
- Substitute half of the graham cracker crumbs with crushed nuts or oats for a lighter crust.


Leave a Comment