
Reese’s Earthquake Cake: A Decadent Delight
Reese’s Earthquake Cake is a dessert that promises to shake up your taste buds with its rich flavors and delightful textures. This indulgent cake combines the beloved taste of chocolate and peanut butter, creating a mouthwatering experience that is hard to resist. Originating from the Southern United States, this cake has become a staple at potlucks and family gatherings, where it never fails to impress.
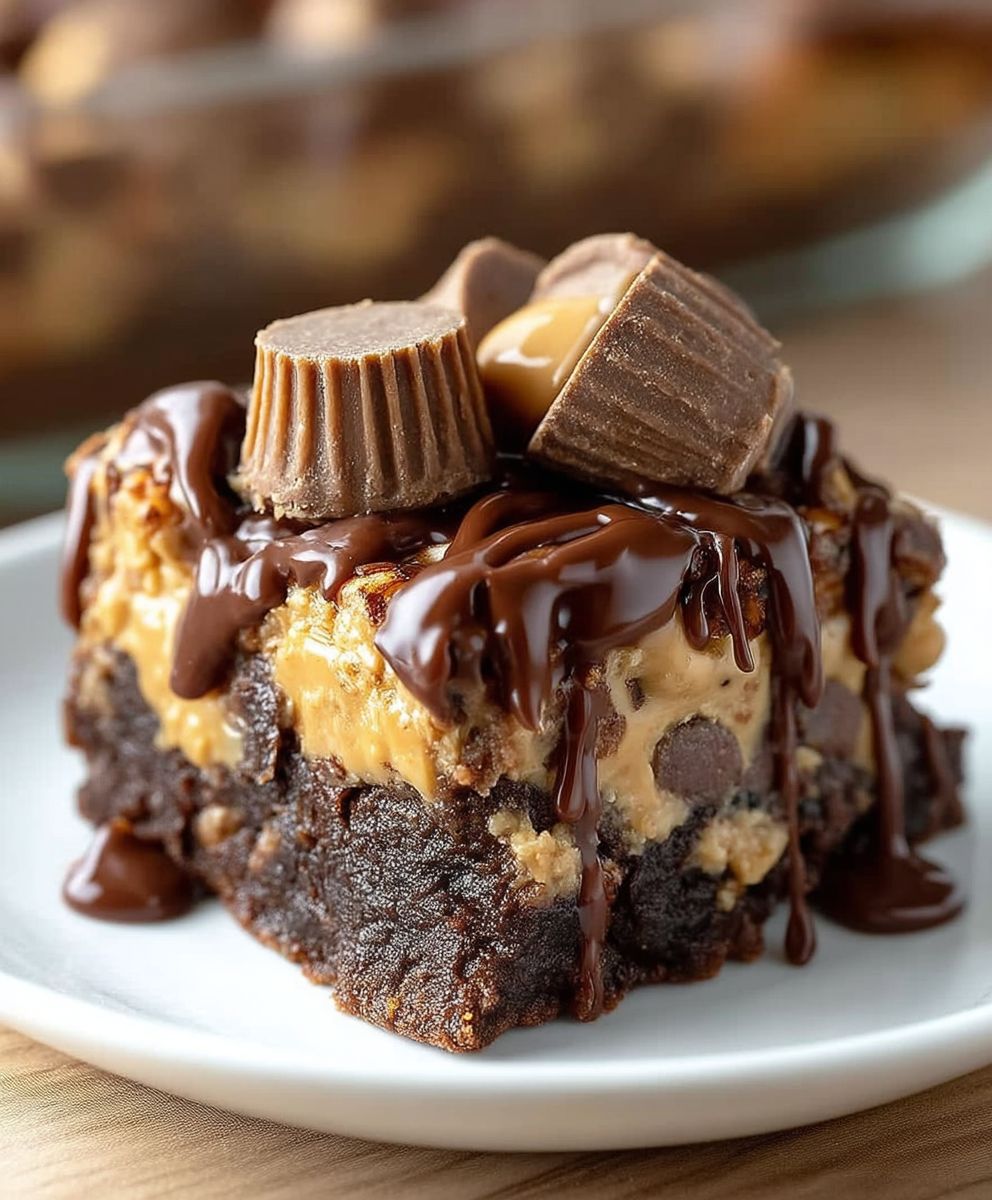
What makes Reese’s Earthquake Cake so special is its unique combination of ingredients. The moist chocolate cake is swirled with creamy peanut butter and topped with a generous layer of Reese’s peanut butter cups, making every bite a heavenly treat. People love this dish not only for its incredible taste but also for its convenience; it’s easy to prepare and perfect for any occasion. Whether you’re celebrating a birthday or simply satisfying a sweet tooth, Reese’s Earthquake Cake is sure to be a crowd-pleaser!

Ingredients:
- 1 box of chocolate cake mix (15.25 oz)
- 1 cup of water
- 1/2 cup of vegetable oil
- 3 large eggs
- 1 cup of creamy peanut butter
- 1 cup of powdered sugar
- 1 cup of semi-sweet chocolate chips
- 1 cup of chopped pecans (optional)
- 1/2 cup of sweetened shredded coconut (optional)
- 1/2 cup of Reese’s Pieces candies (for topping)
Preparing the Batter
- Preheat your oven to 350°F (175°C). Grease a 9×13 inch baking pan with non-stick cooking spray or butter to ensure the cake doesn’t stick.
- In a large mixing bowl, combine the chocolate cake mix, water, vegetable oil, and eggs. Use a hand mixer or a whisk to mix the ingredients until they are well combined and smooth. This should take about 2-3 minutes.
- In a separate bowl, mix together the creamy peanut butter and powdered sugar until it forms a thick, smooth paste. This will be the delicious filling that creates the “earthquake” effect in the cake.
- Once the cake batter is ready, pour half of it into the prepared baking pan, spreading it evenly across the bottom.
- Next, drop spoonfuls of the peanut butter mixture over the cake batter. You want to create a pattern, so don’t worry about spreading it out too much; just make sure it’s evenly distributed.
- Sprinkle the semi-sweet chocolate chips, chopped pecans, and shredded coconut (if using) over the peanut butter mixture. This adds texture and flavor to the cake.
- Pour the remaining chocolate cake batter over the top, covering the peanut butter and toppings. Use a spatula to gently spread it out, but be careful not to disturb the layers underneath.
Cooking Process
- Place the baking pan in the preheated oven and bake for 30-35 minutes. The cake is done when a toothpick inserted into the center comes out clean or with a few moist crumbs.
- Once baked, remove the cake from the oven and let it cool in the pan for about 10-15 minutes. This allows the cake to set and makes it easier to cut.
- After cooling, you can optionally sprinkle the top with Reese’s Pieces candies for an extra touch of sweetness and decoration.
Assembling and Serving
- Once the cake has cooled completely, you can cut it into squares or rectangles. I like to serve it warm, but it’s also delicious at room temperature.
- For an extra indulgent treat, consider serving each piece with a scoop of vanilla ice cream or a dollop of whipped cream on top.
- Store any leftovers in an airtight container at room temperature for up to 3 days, or in the refrigerator for up to a week. You can also freeze the cake for longer storage; just wrap it tightly in plastic wrap and aluminum foil.
Tips for Success
- Make sure all your ingredients are at room temperature before you start. This helps the batter mix more evenly.
- If you want to enhance the chocolate flavor, consider adding a teaspoon of vanilla extract to the cake batter.
- Feel free to customize the toppings! You can use different nuts, chocolate chunks, or even a drizzle of caramel sauce for added flavor.
- For a more intense peanut butter flavor, you can use crunchy peanut butter instead of creamy.
Variations
- For a fun twist, try using a different cake mix flavor, such as vanilla or red velvet, and pair it with the peanut butter filling.
- If you’re a fan of coconut, you can increase the amount of shredded coconut or even add coconut extract to the batter.
- For a healthier version, consider using a sugar-free cake mix and natural peanut butter.
Final Thoughts
This Reese’s Earthquake Cake

Conclusion:
If you’re looking for a dessert that’s not only indulgent but also a showstopper, then this Reese’s Earthquake Cake is an absolute must-try! The combination of rich chocolate cake, creamy peanut butter, and gooey Reese’s cups creates a flavor explosion that will leave your taste buds dancing with joy. This cake is perfect for any occasion, whether it’s a birthday party, a family gathering, or just a cozy night in. The best part? It’s incredibly easy to make, so you can whip it up even on a busy day!
When it comes to serving suggestions, I recommend pairing this decadent cake with a scoop of vanilla ice cream or a dollop of whipped cream to balance out the richness. You can also drizzle some chocolate or caramel sauce on top for an extra touch of sweetness. If you want to get creative, consider adding a sprinkle of crushed peanuts or a few extra Reese’s cups on top for a delightful crunch. This cake is versatile, and you can easily customize it to suit your taste preferences!
For those who might want to switch things up, there are plenty of variations you can try. If you’re a fan of white chocolate, consider using white chocolate chips instead of milk chocolate for a different flavor profile. You could also experiment with different types of nut butter, like almond or cashew, to give the cake a unique twist. And for a fun surprise, try adding a layer of your favorite candy bars or even some chopped fruit in the middle of the cake batter before baking. The possibilities are endless!
I truly encourage you to give this Reese’s Earthquake Cake a shot. It’s not just a dessert; it’s an experience that you’ll want to share with friends and family. Once you’ve made it, I’d love to hear about your experience! Did you try any fun variations? How did your loved ones react to this delicious treat? Sharing your journey not only inspires others to try the recipe but also creates a community of dessert lovers who appreciate the joy of baking.
So, roll up your sleeves, gather your ingredients, and dive into the delightful world of this Reese’s Earthquake Cake. I promise you won’t regret it! Happy baking!
Reese’s Earthquake Cake: A Decadent Chocolate Delight
Indulge in a rich Reese’s Earthquake Cake, featuring layers of chocolate cake and creamy peanut butter, topped with chocolate chips, pecans, and Reese’s Pieces. This decadent dessert offers a gooey center and a delightful burst of flavors, perfect for any occasion.
Ingredients
- 1 box of chocolate cake mix (15.25 oz)
- 1 cup of water
- 1/2 cup of vegetable oil
- 3 large eggs
- 1 cup of creamy peanut butter
- 1 cup of powdered sugar
- 1 cup of semi-sweet chocolate chips
- 1 cup of chopped pecans (optional)
- 1/2 cup of sweetened shredded coconut (optional)
- 1/2 cup of Reese’s Pieces candies (for topping)
Instructions
- Preheat your oven to 350°F (175°C). Grease a 9×13 inch baking pan with non-stick cooking spray or butter.
- In a large mixing bowl, combine the chocolate cake mix, water, vegetable oil, and eggs. Mix until well combined and smooth (about 2-3 minutes).
- In a separate bowl, mix together the creamy peanut butter and powdered sugar until it forms a thick, smooth paste.
- Pour half of the cake batter into the prepared baking pan, spreading it evenly.
- Drop spoonfuls of the peanut butter mixture over the cake batter, creating a pattern.
- Sprinkle the semi-sweet chocolate chips, chopped pecans, and shredded coconut (if using) over the peanut butter mixture.
- Pour the remaining chocolate cake batter over the top, gently spreading it out without disturbing the layers underneath.
- Bake in the preheated oven for 30-35 minutes, or until a toothpick inserted into the center comes out clean or with a few moist crumbs.
- Remove the cake from the oven and let it cool in the pan for 10-15 minutes.
- Optionally, sprinkle the top with Reese’s Pieces candies for decoration.
- Once cooled completely, cut the cake into squares or rectangles. Serve warm or at room temperature.
- For an indulgent treat, serve with a scoop of vanilla ice cream or whipped cream.
- Store leftovers in an airtight container at room temperature for up to 3 days, or in the refrigerator for up to a week. Freeze for longer storage.
Notes
- Ensure all ingredients are at room temperature for even mixing.
- Enhance chocolate flavor with a teaspoon of vanilla extract.
- Customize toppings with different nuts or chocolate chunks.
- Use crunchy peanut butter for a more intense peanut butter flavor.


Leave a Comment